Tutorial for Latest Ambari(2.7.1)
Before I start to install Ambari 2.7.1, I wrote some key information that I need to use later.
Key Information
| hostname | ip | operating system | RAM | disk space | cores of CPU | package |
|---|---|---|---|---|---|---|
| master01.ambari.com | 192.168.110.210 | CentOS-7-x86_64-Minimal-1611.iso | 20g | 100g | 16 | ambari-server |
| slave01.ambari.com | 192.168.110.211 | CentOS-7-x86_64-Minimal-1611.iso | 20g | 100g | 16 | ambari-agent |
| slave02.ambari.com | 192.168.110.212 | CentOS-7-x86_64-Minimal-1611.iso | 20g | 100g | 16 | ambari-agent |
VM Setting and CentOS7 Installation
VM Setting
Upload the IOS file
Before we start to create VMs and install CentOS7, we ought to upload CentOS7 installation file (using minimal version) to Datacenter in VMware Vsphere.
Choose a specific data node in your Datacenter, then upload files.

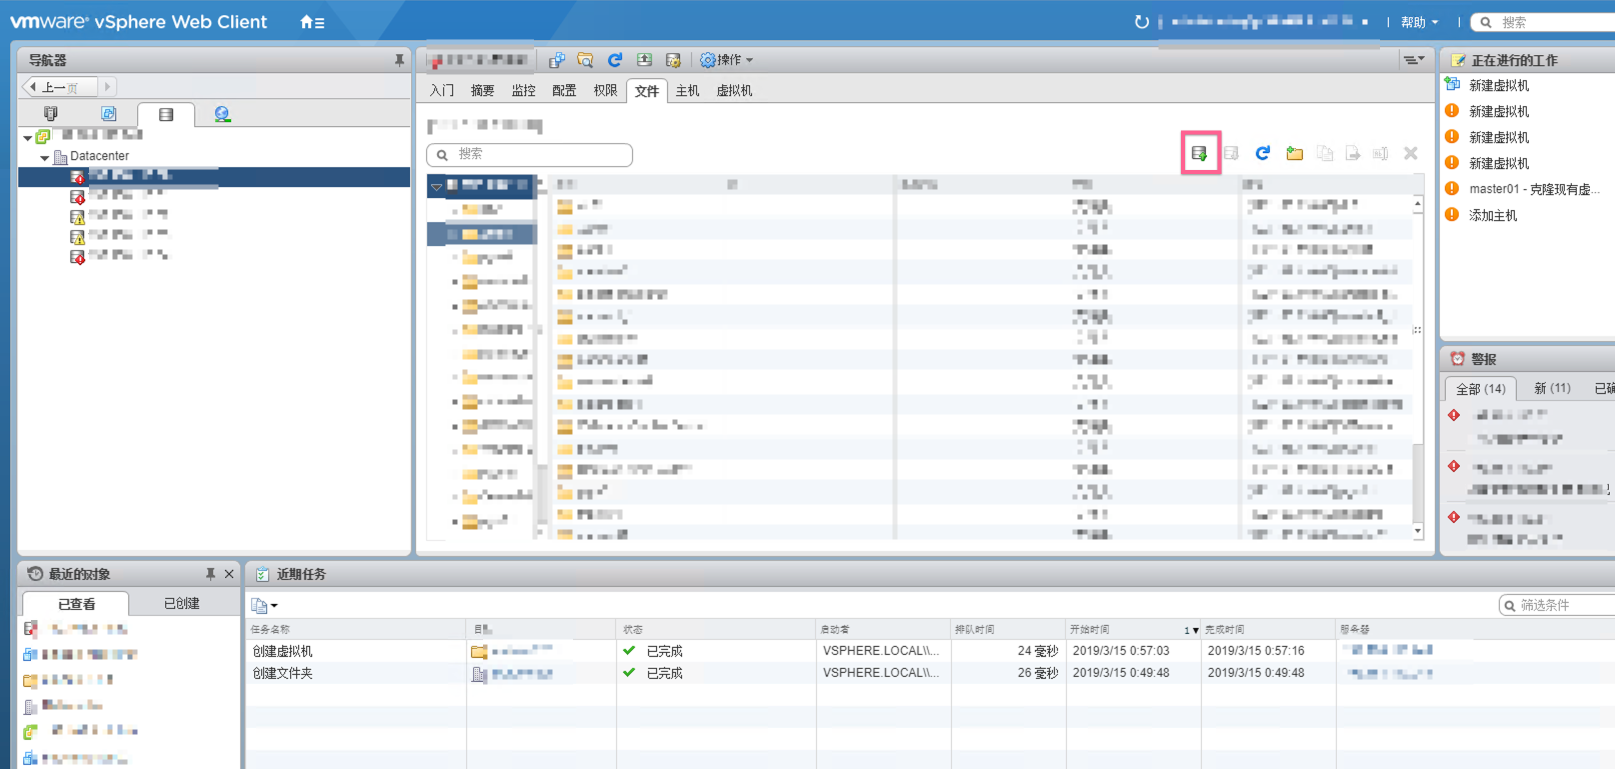
Create VMs
Visit and login vsphere Web Client.
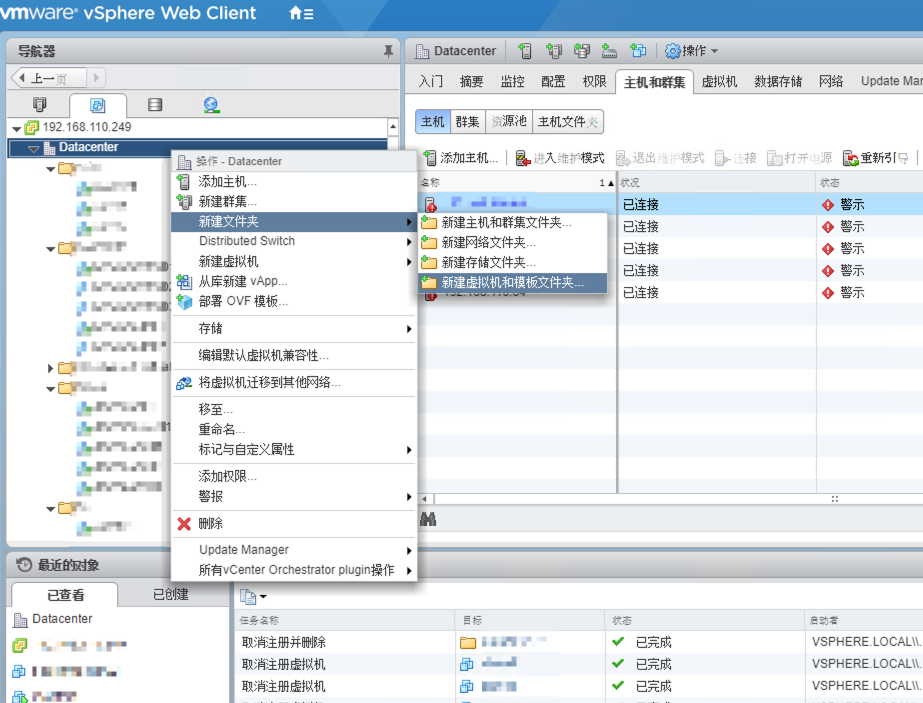
Create a folder for collecting all nodes.
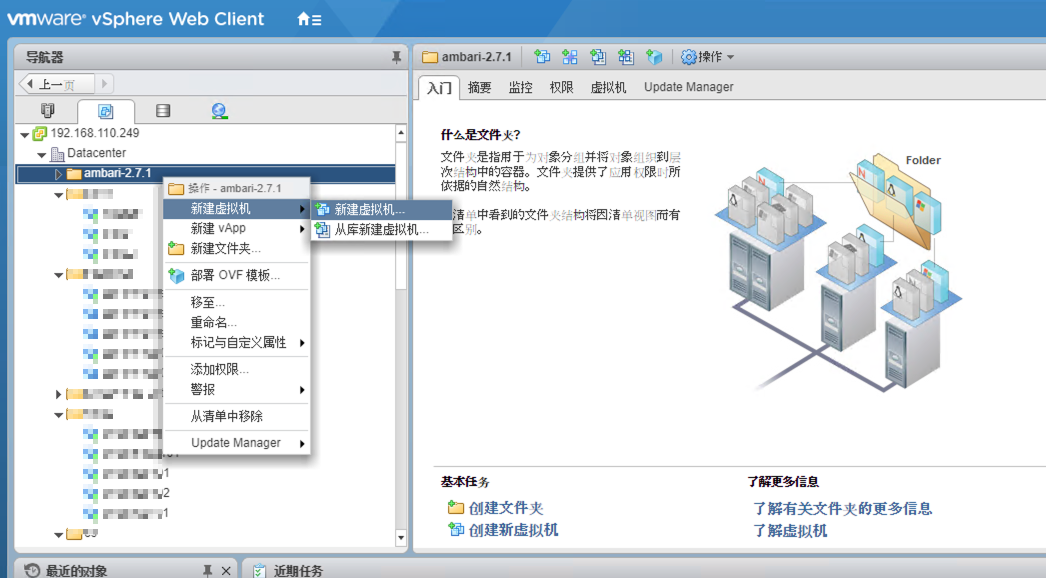
Create a VM node in a specific folder that created in the last step.
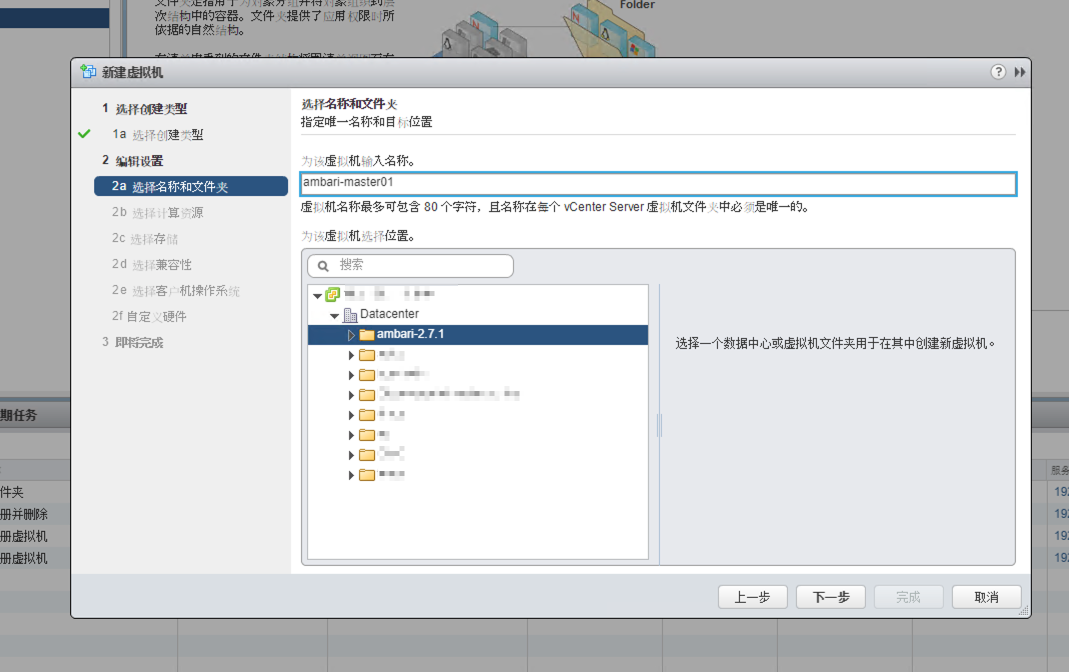
Input the name of VM
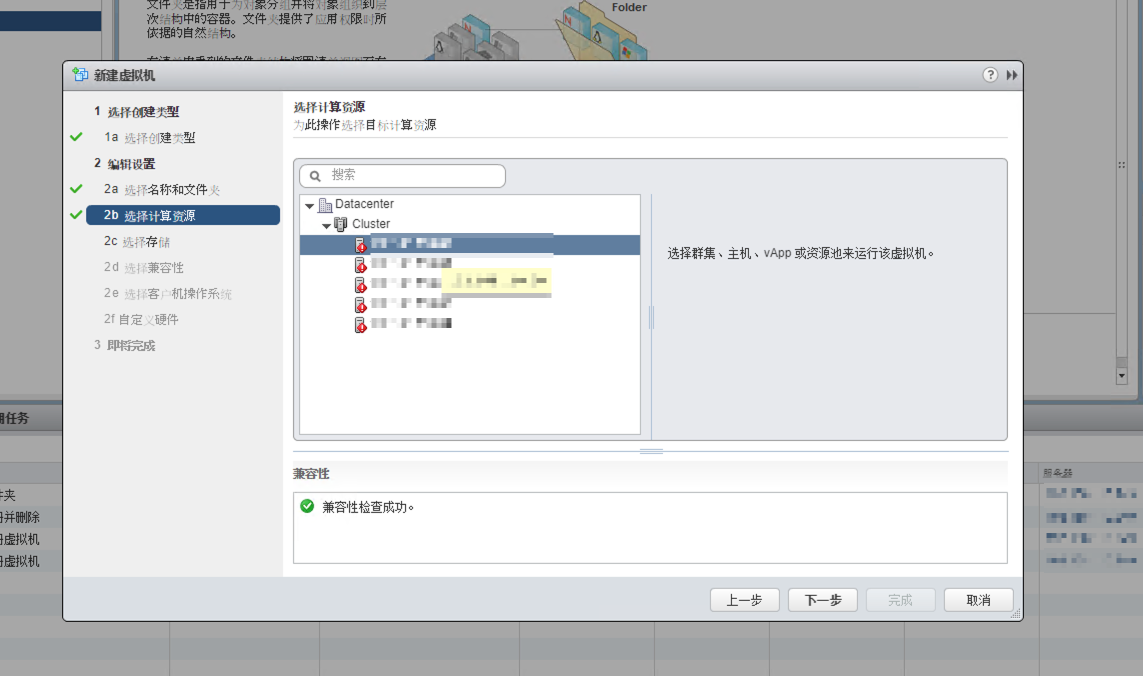
Choose computing resources.
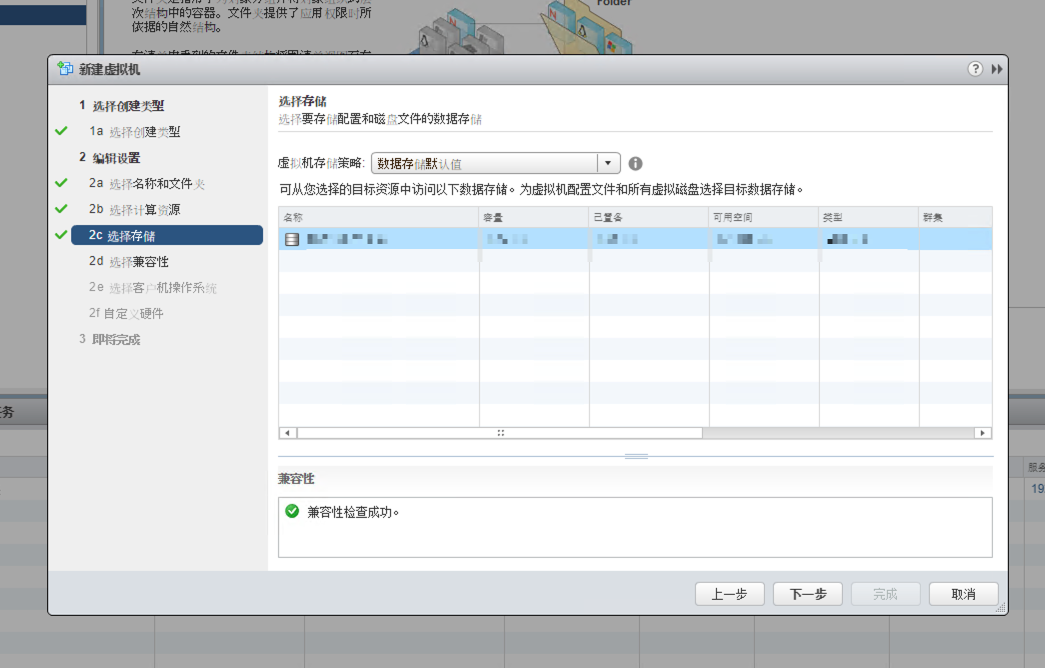
Choose the storage node.
Choose the compatibility of your VM.
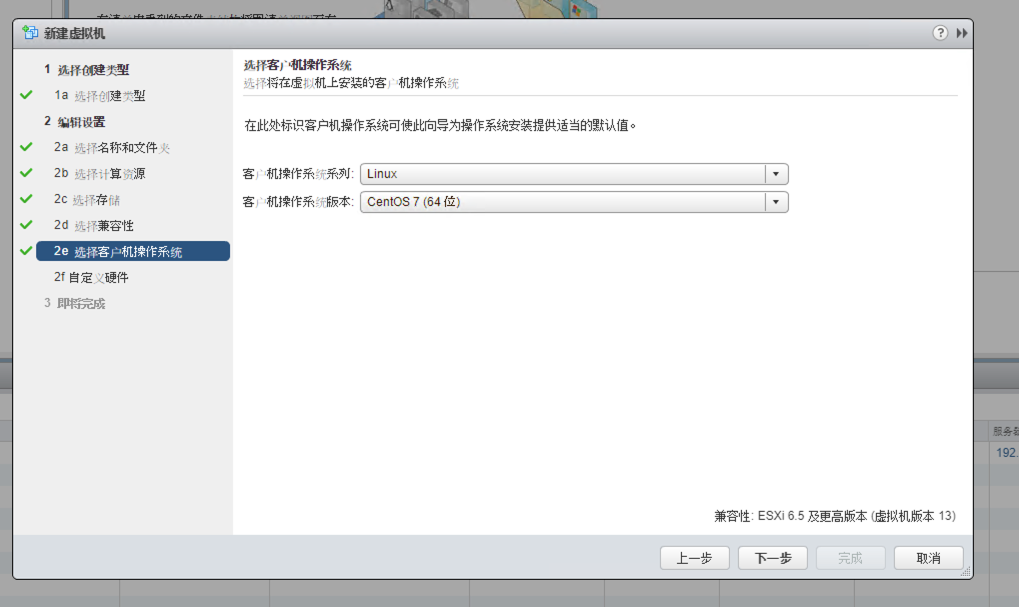
Choose the version of your VM.
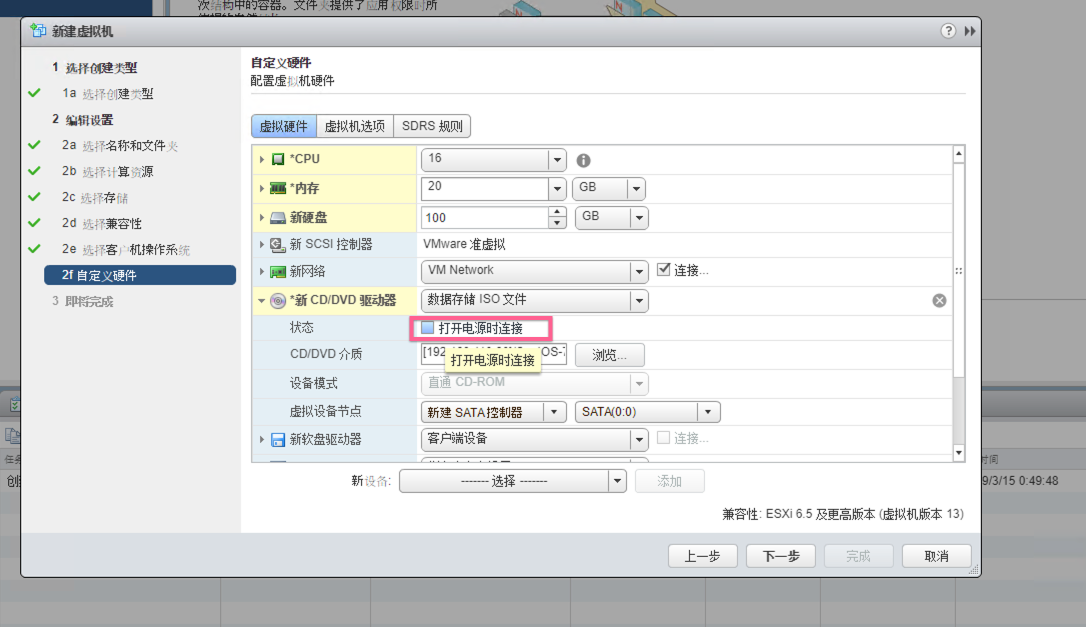
Input the number of your CPU cores, the memory size, the hard-drive size and the IOS file path of your CentOS7.


CentOS7 Installation
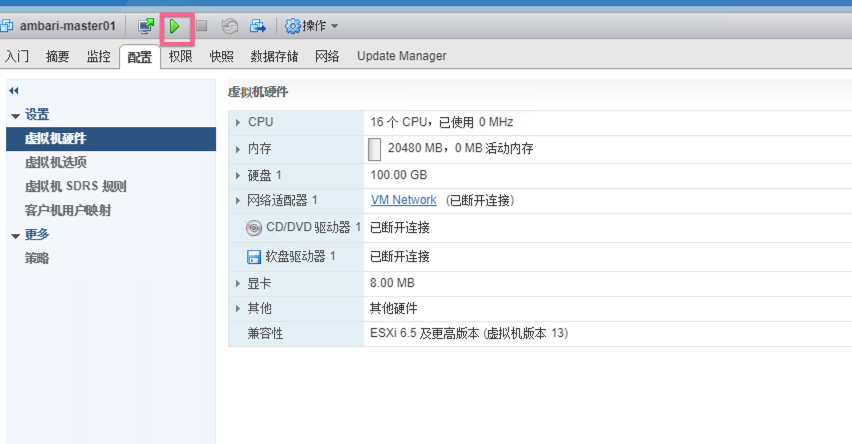
Power on the VM.
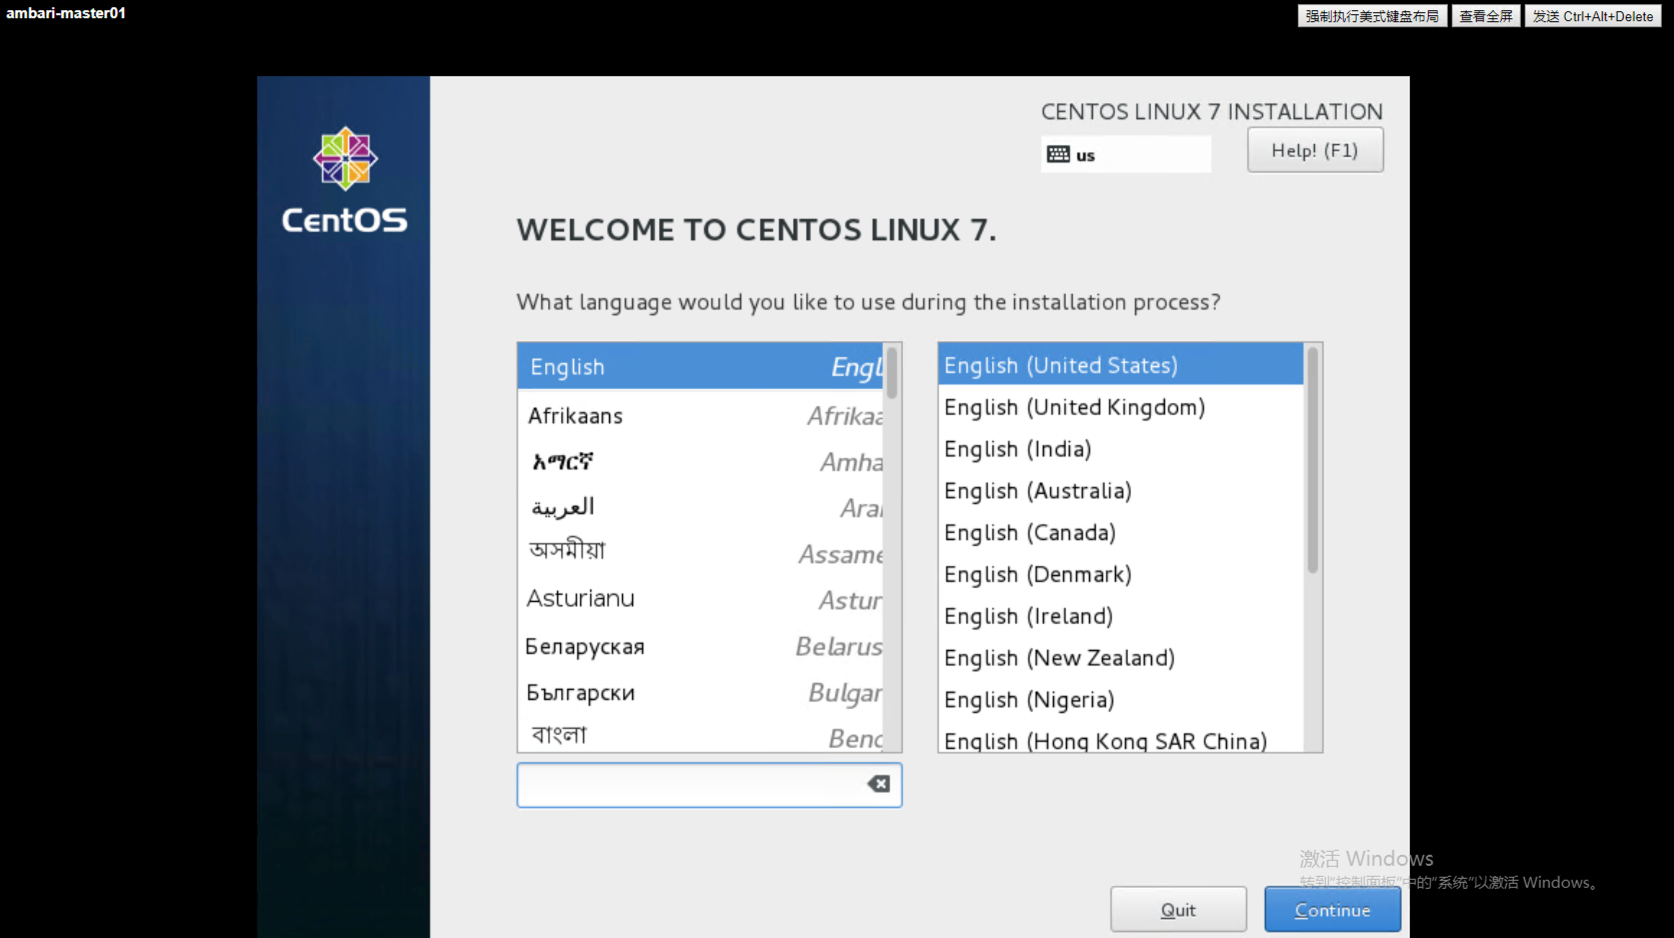
Choose the language, then click the button “Continue”.
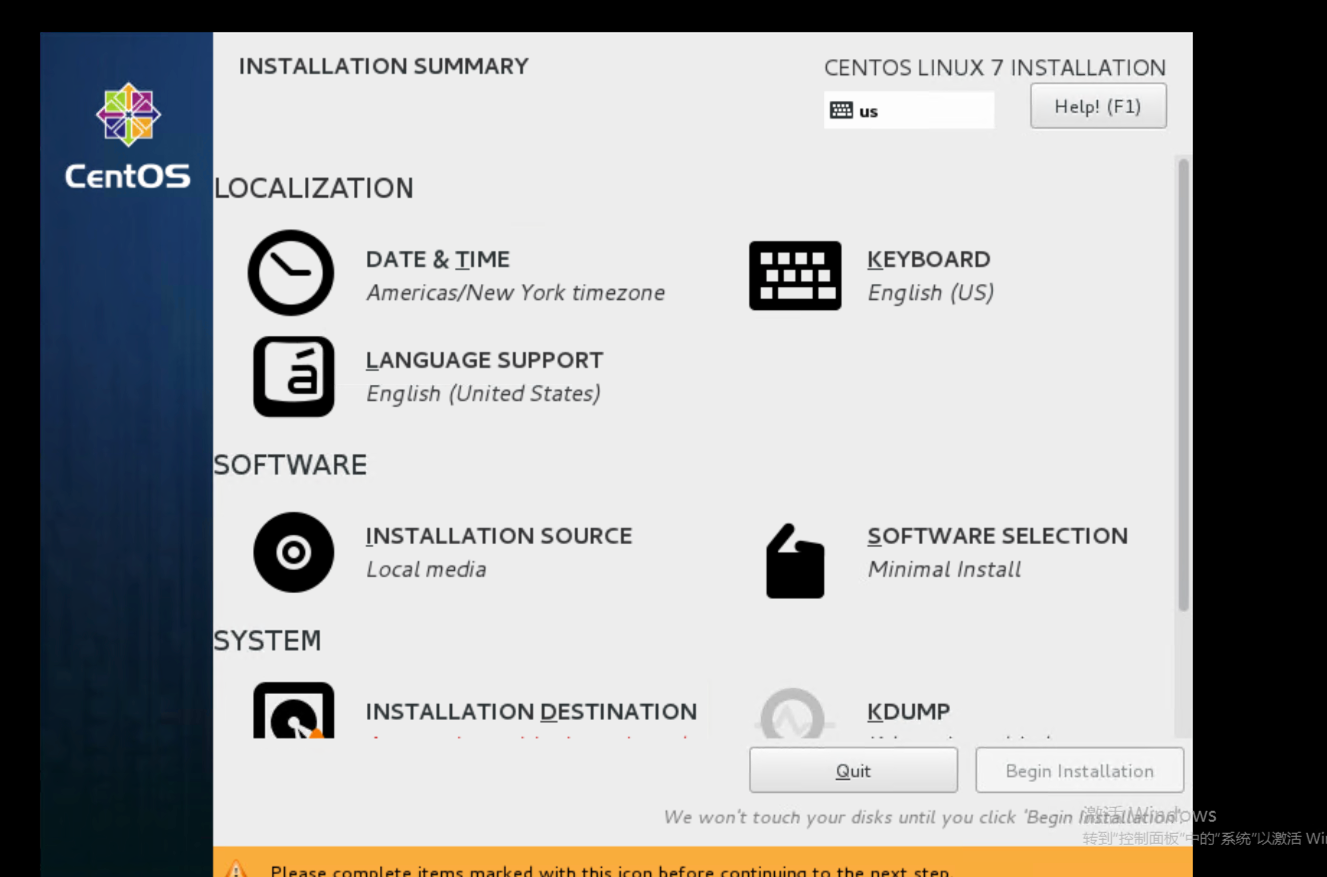
Start to update setting(changing date&time, specifying installation destination, turning on the network).
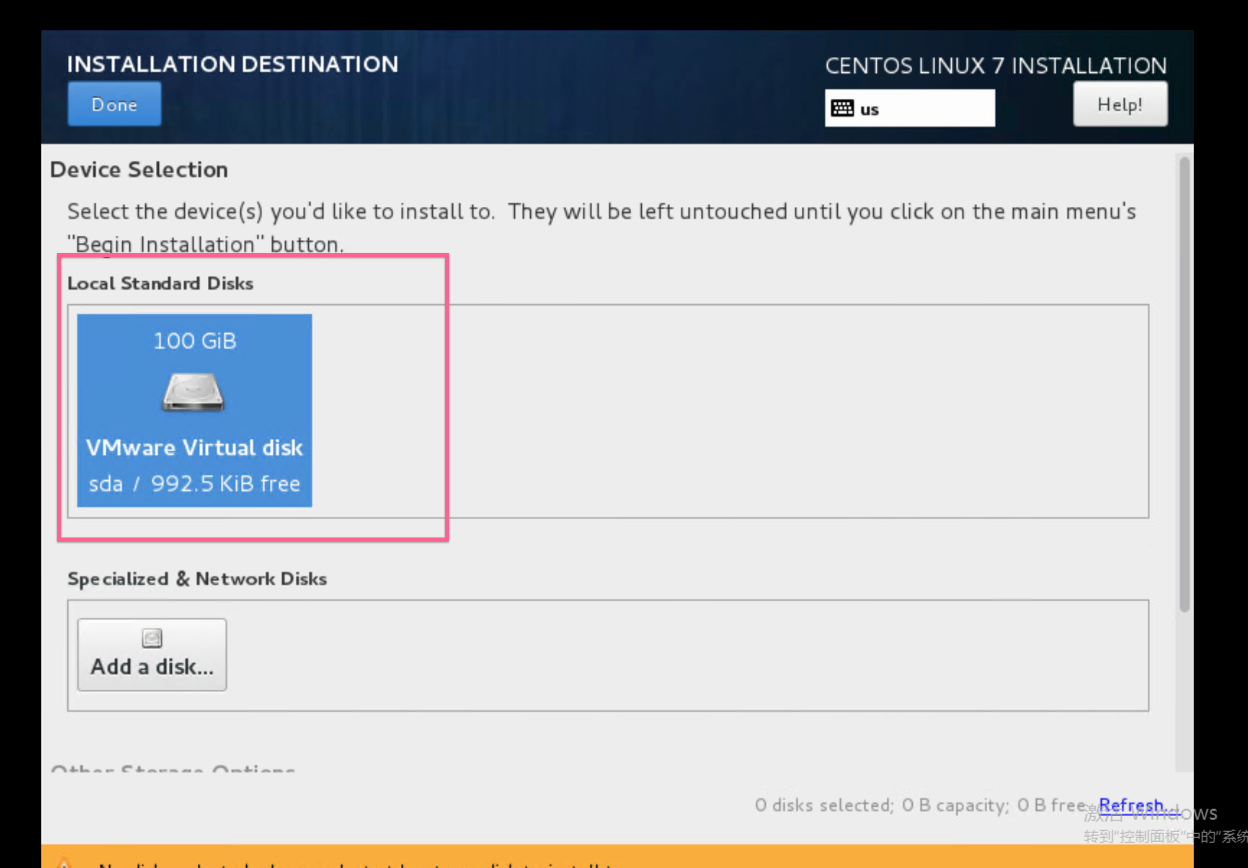
Specify the installation destination.
Turn on the network or update the configuration of the network.
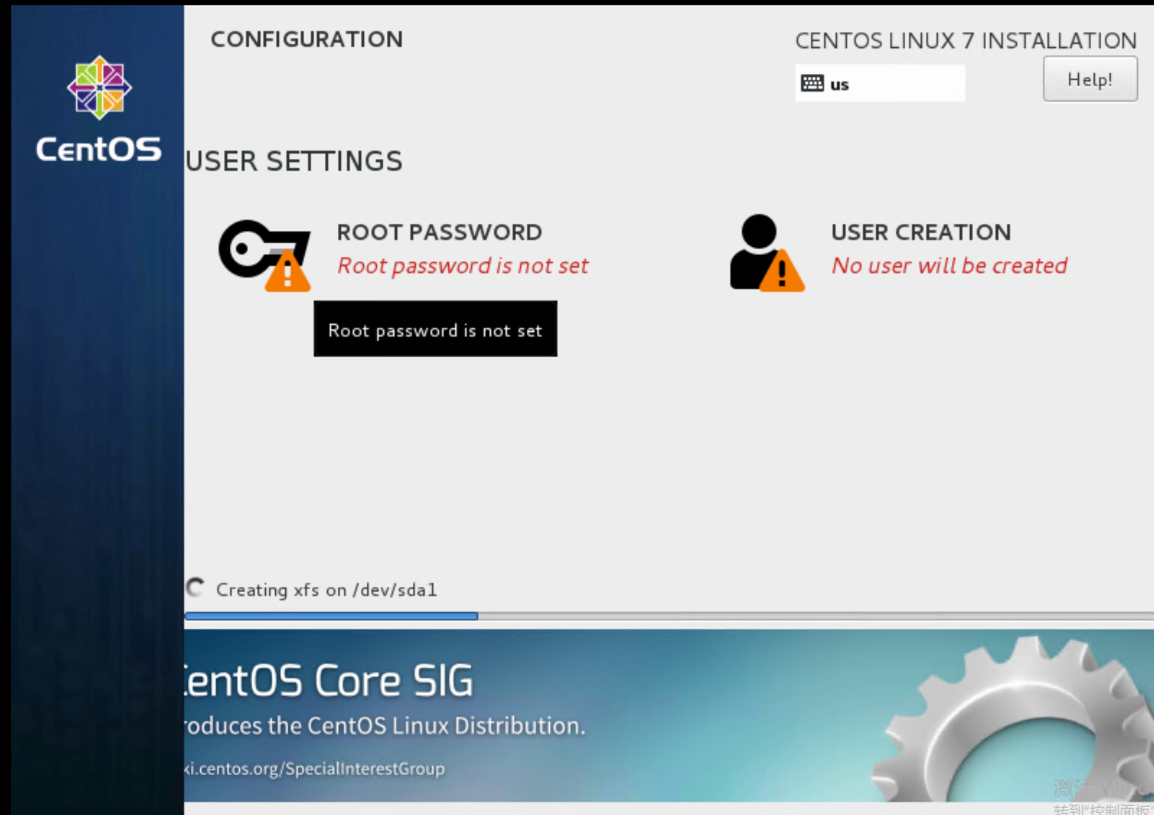
Finally, update the password of the user root.


File Preparation
We can download the requisite installation file from the official website below.
1 | #Ambari |
Ambari installation file.
ambari-2.7.1.0-centos7.tar.gz.tar
HDP installation file.
HDP-3.0.1.0-centos7-rpm.tar.gz.tar
HDP-UTILS-1.1.0.22-centos7.tar.gz.tar
HDF installation file.
hdf-ambari-mpack-3.2.0.0-520.tar.gz.tar
HDF-3.2.0.0-centos7-rpm.tar.gz.tar
System Preparation
Before we start to install Ambari 2.7.1 cluster, some important steps we need to complete.
Install some basic tools.
1
2yum -y install unzip
yum -y install wgetChange the Hostname on all cluster hosts.
Edit the Host File on all cluster hosts.
1
vi /etc/hosts
Then append the content below to the Host File (Do NOT delete the original contents).
1
2
3192.168.110.210 master01.ambari.com master01
192.168.110.211 slave01.ambari.com slave01
192.168.110.212 slave02.ambari.com slave02Set the Hostname on all cluster hosts.
master01.ambari.com:
1
hostname master01.ambari.com
slave01.ambari.com:
1
hostname slave01.ambari.com
slave02.ambari.com:
1
hostname slave02.ambari.com
Edit the Network Configuration File on all cluster hosts.
1
vi /etc/sysconfig/network
Then append the contents below to the file.
1
2NETWORKING=yes
HOSTNAME=<fully.qualified.domain.name>Test the hostname on all cluster hosts.
1
2hostname
hostname -fIf the result above is incorrect, you need to repair it until the result is what you expect it.
Set up Password-less SSH
To have Ambari Server automatically install Ambari Agent on all your cluster hosts, you must set up a password-less SSH connection between the Ambari Server host and all other hosts in the cluster.
Generate public and private SSH keys on the Ambari Server host.
1
ssh-keygen
Using the ssh command to copy a master public key file to slave nodes.
1
2ssh-copy-id -i ~/.ssh/id_rsa.pub root@slave01.ambari.com
ssh-copy-id -i ~/.ssh/id_rsa.pub root@slave02.ambari.comTest connections between the Ambari Server and the other cluster hosts.
1
2
3ssh root@master01.ambari.com
ssh root@slave01.ambari.com
ssh root@slave02.ambari.comIt is successful when you do not need to input any passwords.
Enable NTP on all cluster hosts.
1
2yum install -y ntp
systemctl enable ntpdDisable SELinux on all cluster hosts.
1
vi /etc/selinux/config
Then change the value of SELINUX.
1
SELINUX=disabled
Disable iptables on all cluster hosts.
For Ambari to communicate during installation, certain ports must be open and available. So, the easiest way to do this is to temporarily disable iptables.
1
2systemctl disable firewalld
systemctl stop firewalldInstall Oracle JDK8 (Not JRE) and add JCE extension package on all cluster hosts.
You can also install JDK8 including JCE automatically on the step that runs command “amber-server setup”
Download the Oracle JDK8 installation file from Oracle.
Download the JCE installation file.
1
http://www.oracle.com/technetwork/java/javase/downloads/jce8-download-2133166.html
Install JDK8 firstly on all cluster hosts.
1
yum install [your jdk8 yum installation file]
Unzip JCE file to “$JAVA_HOME/jre/lib/security/“ on all cluster hosts.
1
unzip -o -j -q jce_policy-8.zip -d /usr/java/jdk1.8.0_201-amd64/jre/lib/security
Reboot.
JDK HOME
1
/usr/java/jdk1.8.0_201-amd64/
Install Mysql Server on the Ambari Server host.
Download and add the repository, then update.
1
2
3wget http://repo.mysql.com/mysql-community-release-el7-5.noarch.rpm
rpm -ivh mysql-community-release-el7-5.noarch.rpm
yum updateInstall mysql-server and start the service.
1
2yum install mysql-server
systemctl start mysqldChange the password of the user ROOT (the default password is blank).
1
mysql -uroot -p
1
2set password for 'root'@'localhost' = password('root');
set password for 'root'@'master01.ambari.com' = password('root');Create the database “ambari” and the user “ambari”.
1
2
3
4
5
6
7create database ambari;
create user 'ambari'@'localhost' identified by 'ambari';
create user 'ambari'@'master01.ambari.com' identified by 'ambari';
grant all on ambari.* to 'ambari'@'localhost';
grant all on ambari.* to 'ambari'@'master01.ambari.com';
Download mysql-connector-java.jar and put this jar to a specific folder on the Ambari Server host.
1
2
3
4
5
6
7
8wget http://central.maven.org/maven2/mysql/mysql-connector-java/5.1.47/mysql-connector-java-5.1.47.jar
mkdir /usr/share/java
cp /root/mysql-connector-java-5.1.47.jar /usr/share/java/
#JDBC Driver Path
/usr/share/java/mysql-connector-java-5.1.47.jarSetting up a local repository with NO Internet access on the Ambari Server host.
Install and start httpd.
1
2
yum -y install httpd
systemctl start httpdUntar installation file to the web server folder.
1
2
3
4
5
6
7mkdir /var/www/html/hdf
mkdir /var/www/html/hdp
tar -xvf /root/ambari-2.7.1.0-centos7.tar.gz.tar -C /var/www/html
tar -xvf /root/HDP-3.0.1.0-centos7-rpm.tar.gz.tar -C /var/www/html/hdp
tar -xvf /root/HDP-UTILS-1.1.0.22-centos7.tar.gz.tar -C /var/www/html/hdp
tar -xvf /root/HDF-3.2.0.0-centos7-rpm.tar.gz.tar -C /var/www/html/hdfConfirm that you can browse to the newly created local repository.
1
2
3
4
5
6
7
8
9
10
11#Ambari BaseURL
http://192.168.110.210/ambari/centos7/2.7.1.0-169/
#HDP BaseURL
http://192.168.110.210/hdp/HDP/centos7/3.0.1.0-187/
#HDP-UTIL BaseURL
http://192.168.110.210/hdp/HDP-UTILS/centos7/1.1.0.22/
#HDF BaseURL
http://192.168.110.210/hdf/HDF/centos7/3.2.0.0-520/Downloading and Editing the Ambari Repository Configuration File to Use the Local Repository.
1
2
3wget -nv http://public-repo-1.hortonworks.com/ambari/centos7/2.x/updates/2.7.1.0/ambari.repo -O /etc/yum.repos.d/ambari.repo
vi /etc/yum.repos.d/ambari.repoReplace the Ambari baseurl to your local repository.
1
2
3
4
5
6
7
8
9#VERSION_NUMBER=2.7.1.0-169
[ambari-2.7.1.0]
#json.url = http://public-repo-1.hortonworks.com/HDP/hdp_urlinfo.json
name=ambari Version - ambari-2.7.1.0
baseurl=http://192.168.110.210/ambari/centos7/2.7.1.0-169/
gpgcheck=1
gpgkey=http://public-repo-1.hortonworks.com/ambari/centos7/2.x/updates/2.7.1.0/RPM-GPG-KEY/RPM-GPG-KEY-Jenkins
enabled=1
priority=1
Install and set up the Ambari server on the Ambari Server host.
1
yum install ambari-server
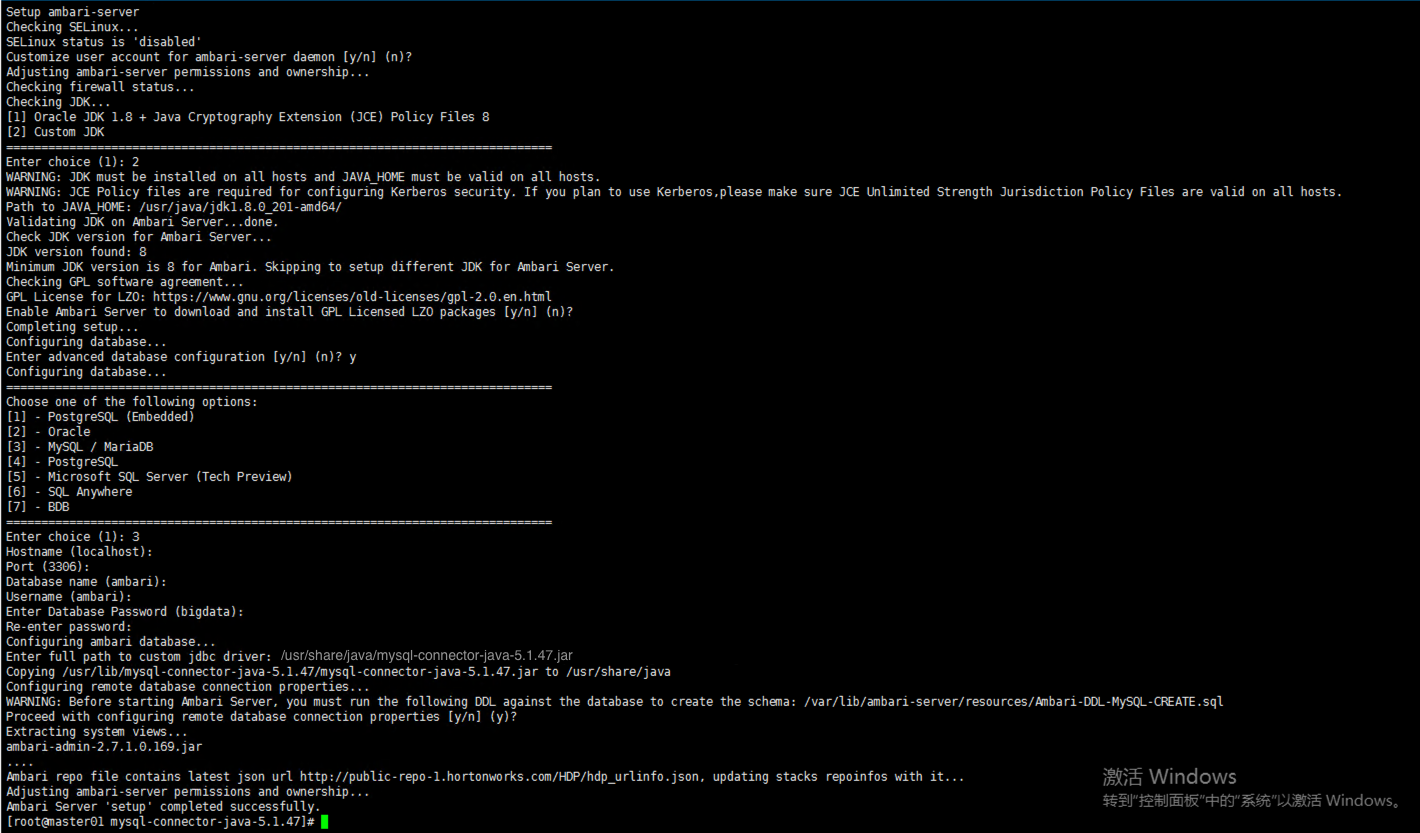
Then, start to set up ambari-server.
1
ambari-server setup
Run the SQL script.
1
2
3
4
5mysql -uambari -p
use ambari;
source /var/lib/ambari-server/resources/Ambari-DDL-MySQL-CREATE.sqlStart Ambari-server.
1
ambari-server start

Installing Ambari Cluster
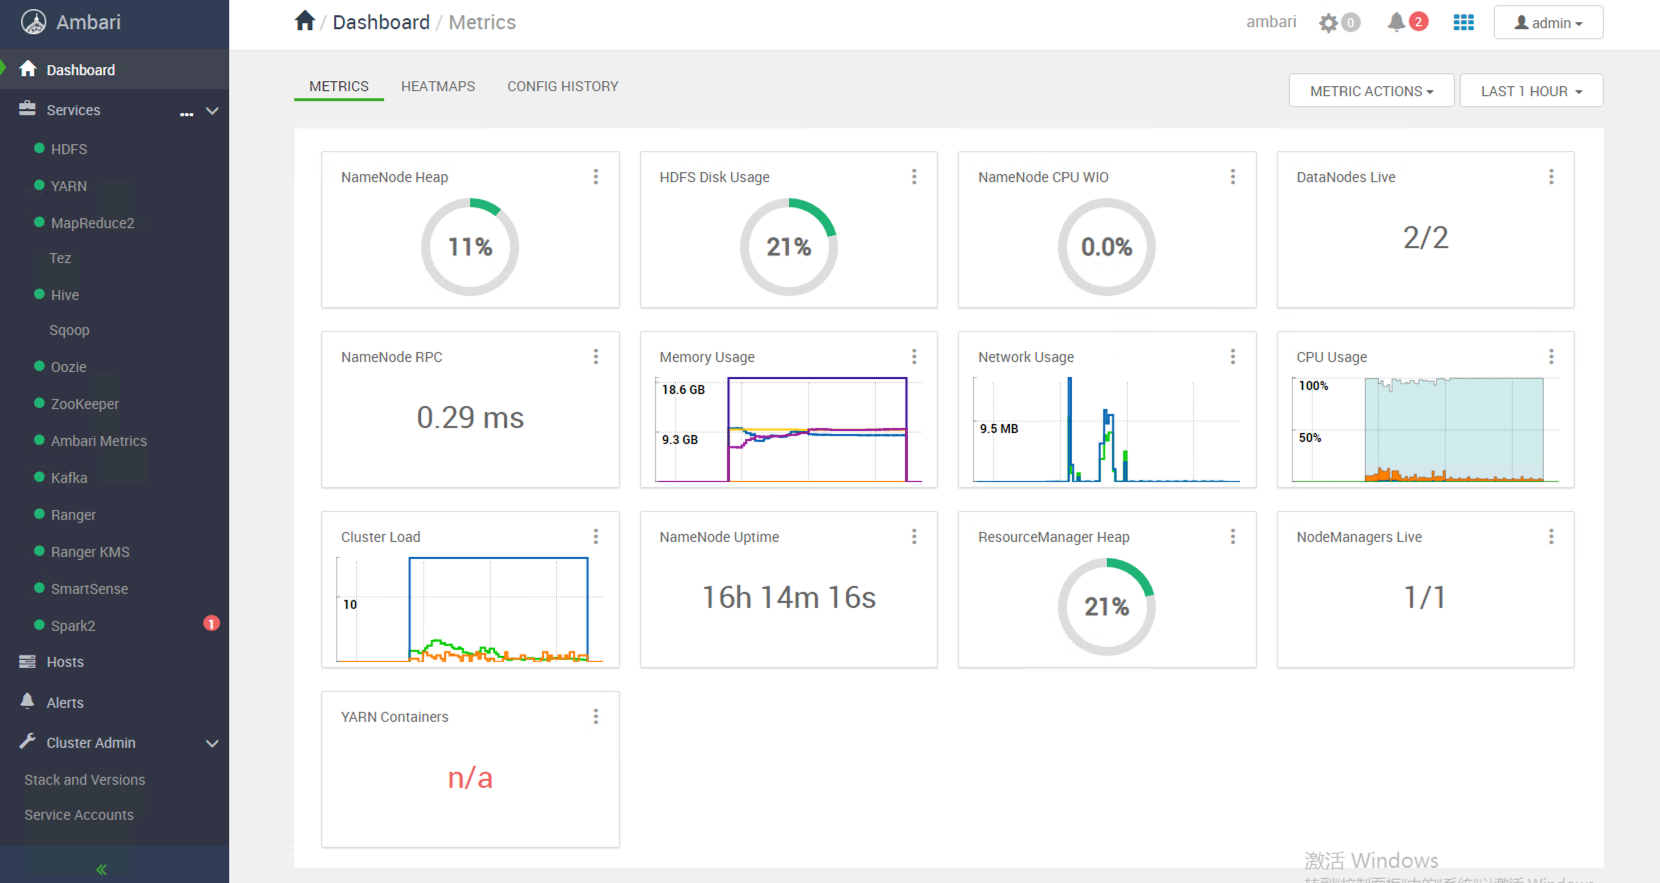
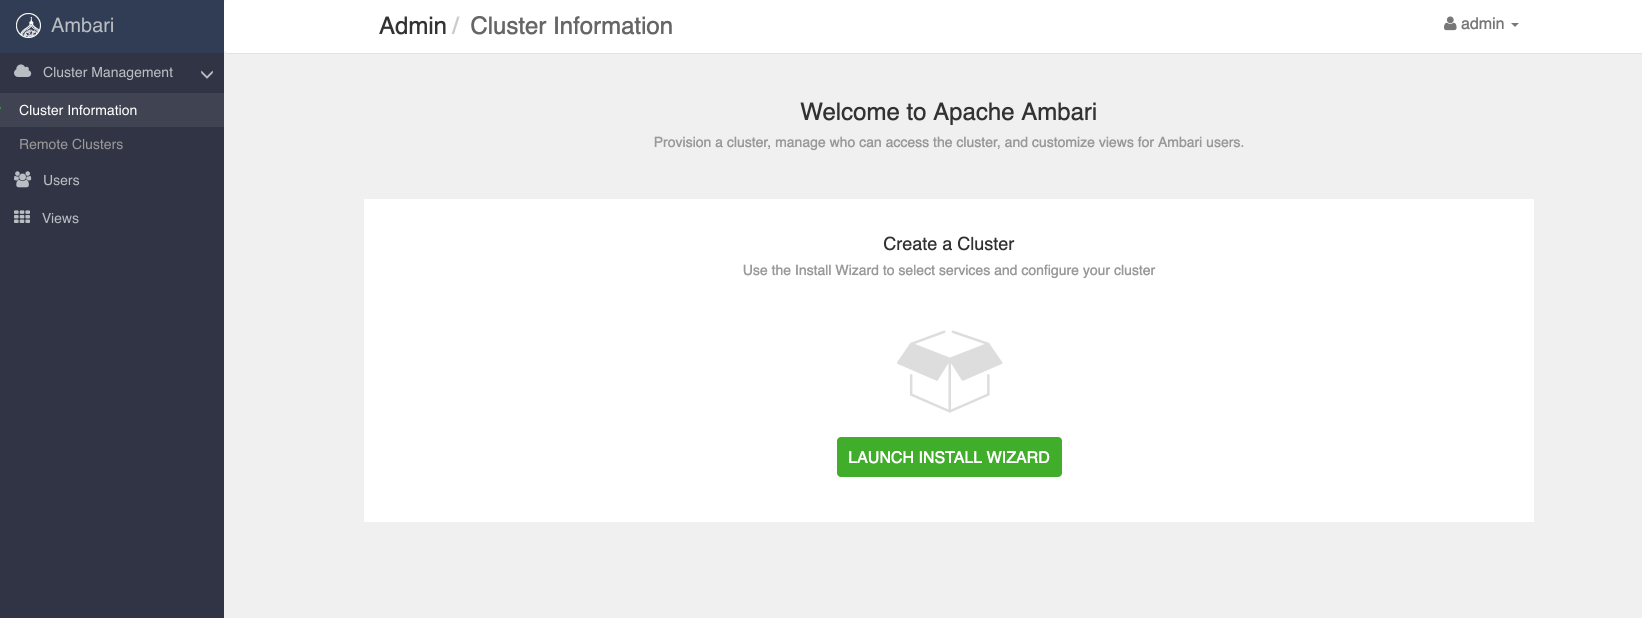
Browse Ambari WebUI, then use account admin to log in.
Launch Install Wizard.
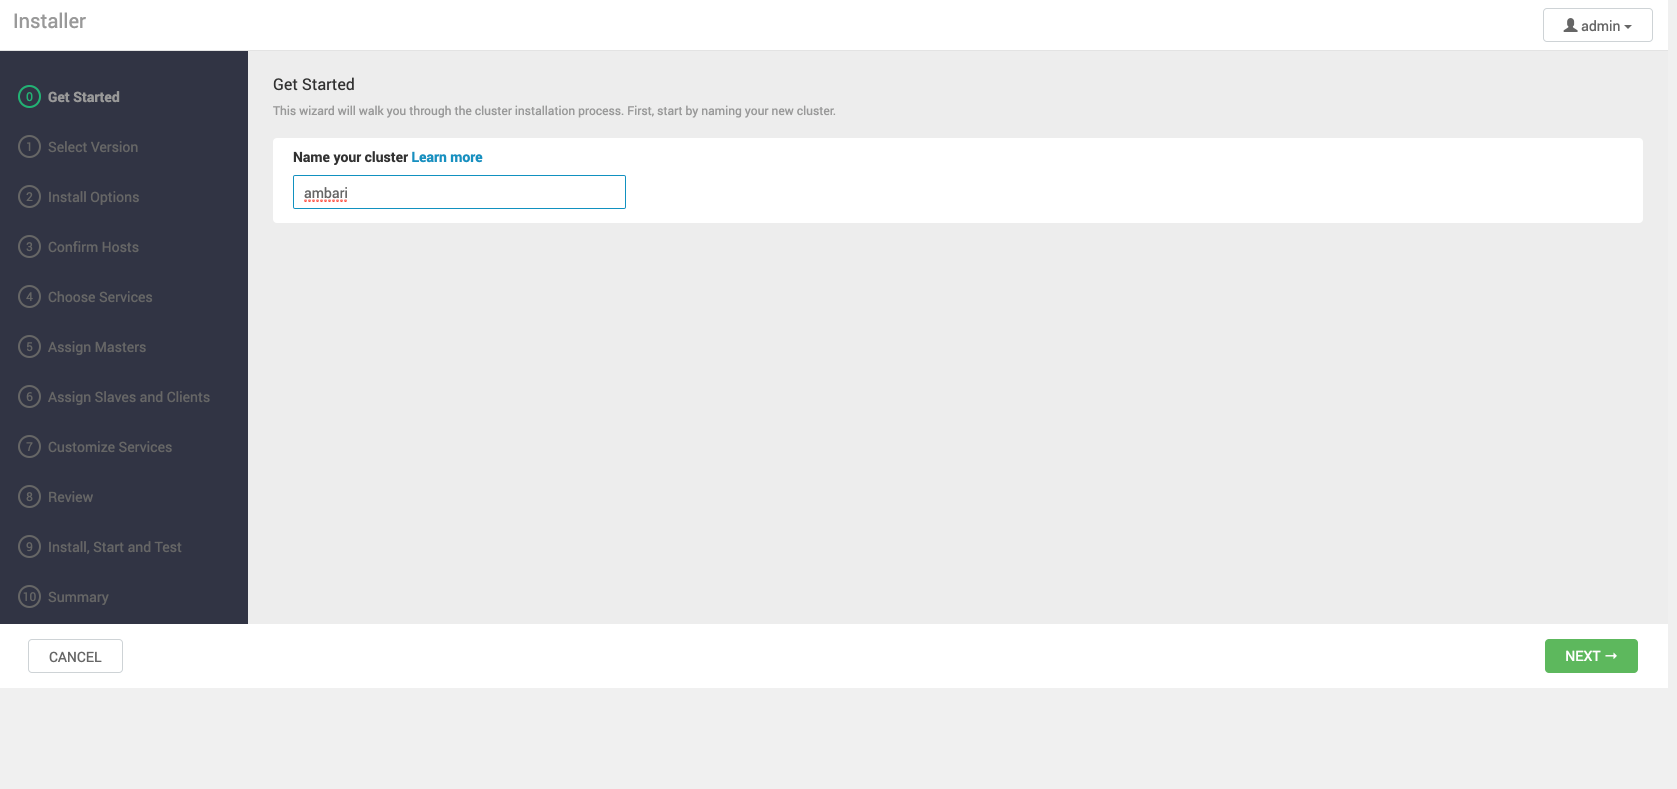
Step 0: Name your cluster.
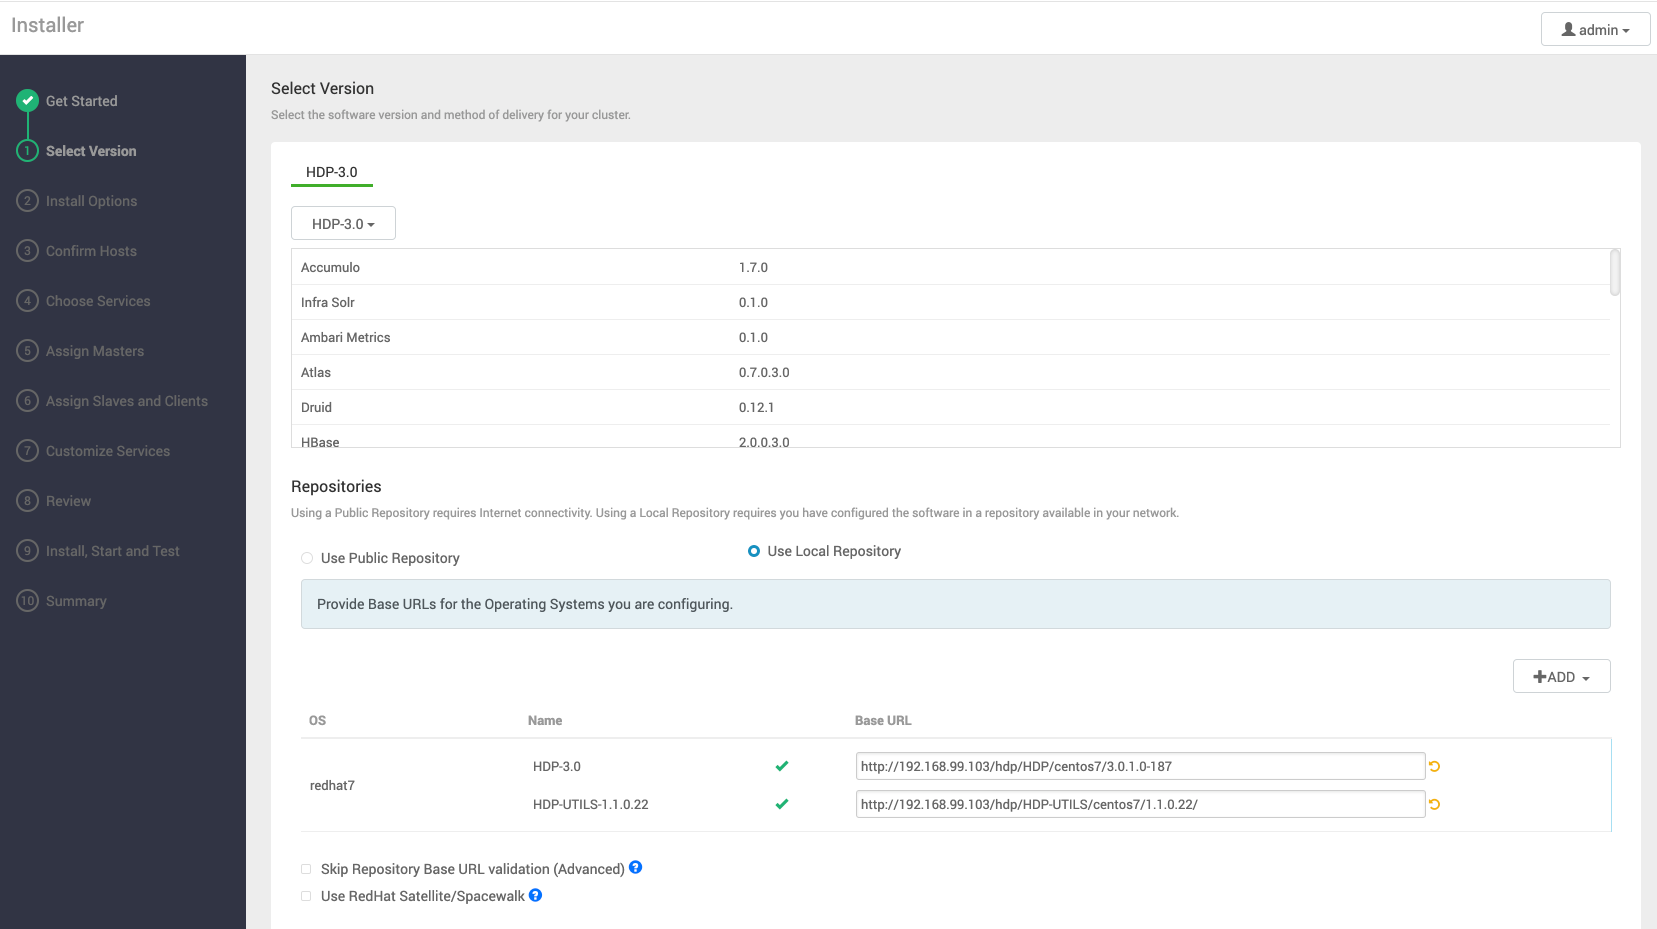
Step 1: Edit BaseURL to your local repository.
Step 2: Input a list of hosts using the hostname and input your ssh private key of the Ambari server host.


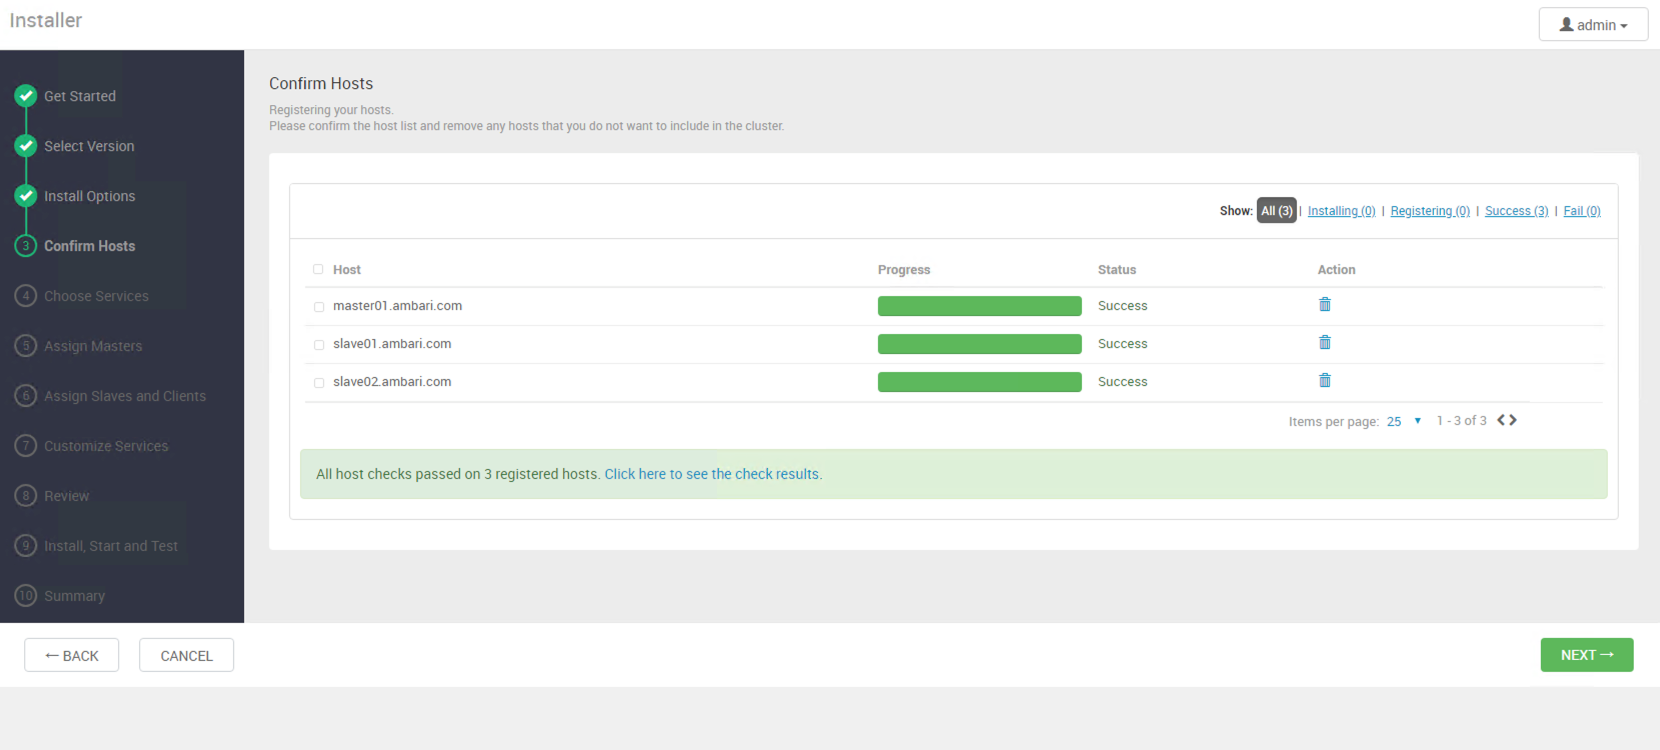
Step 3: Confirm Hosts.
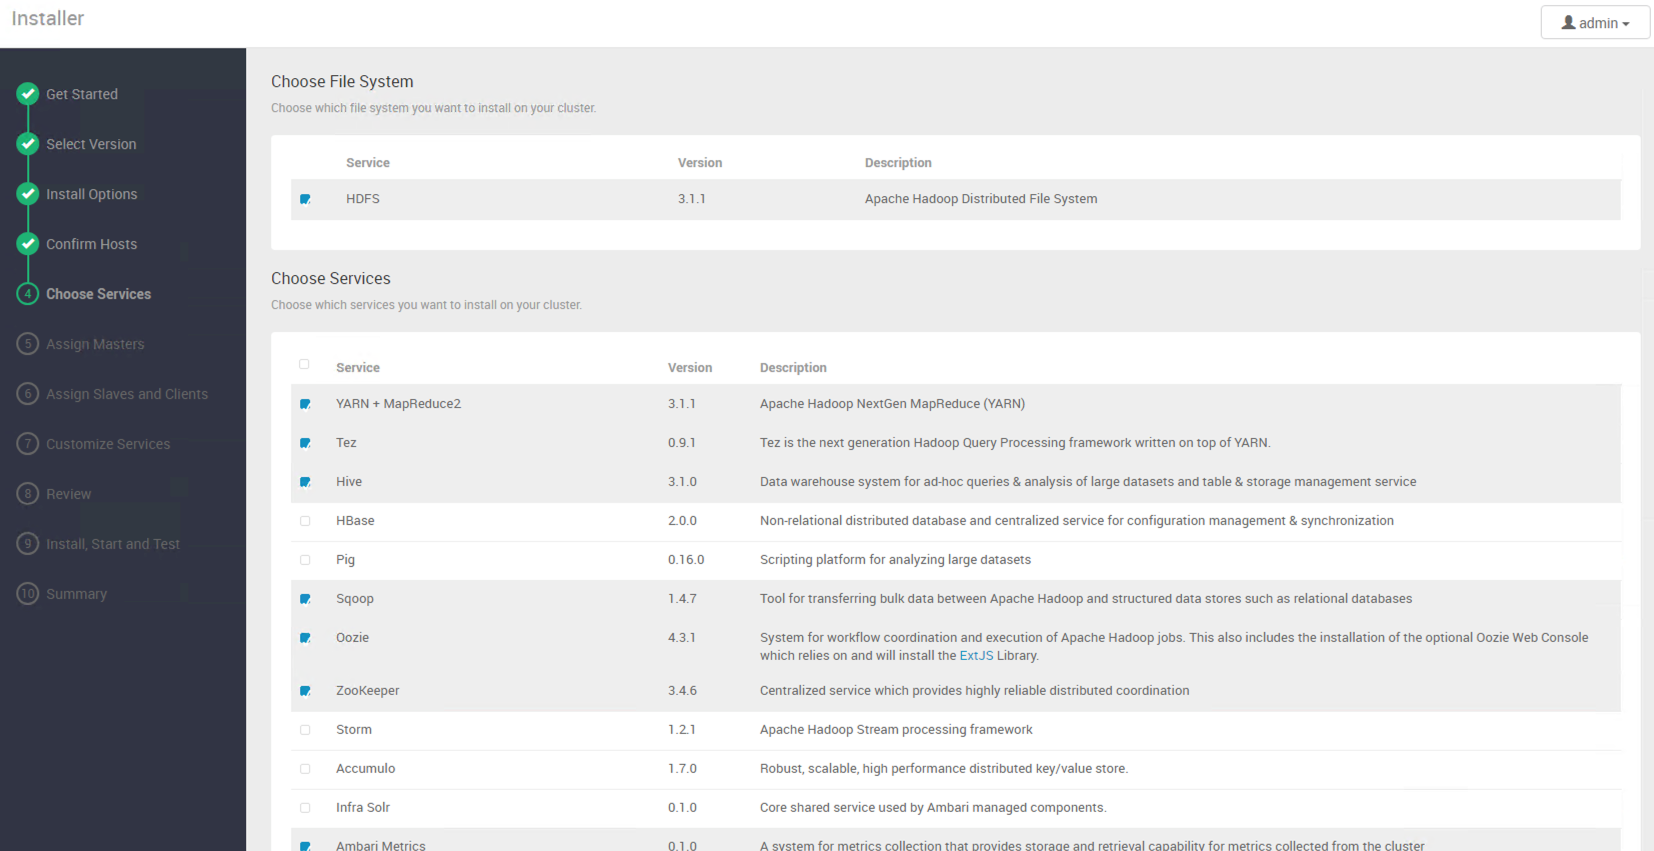
Step 4: Choose Services.
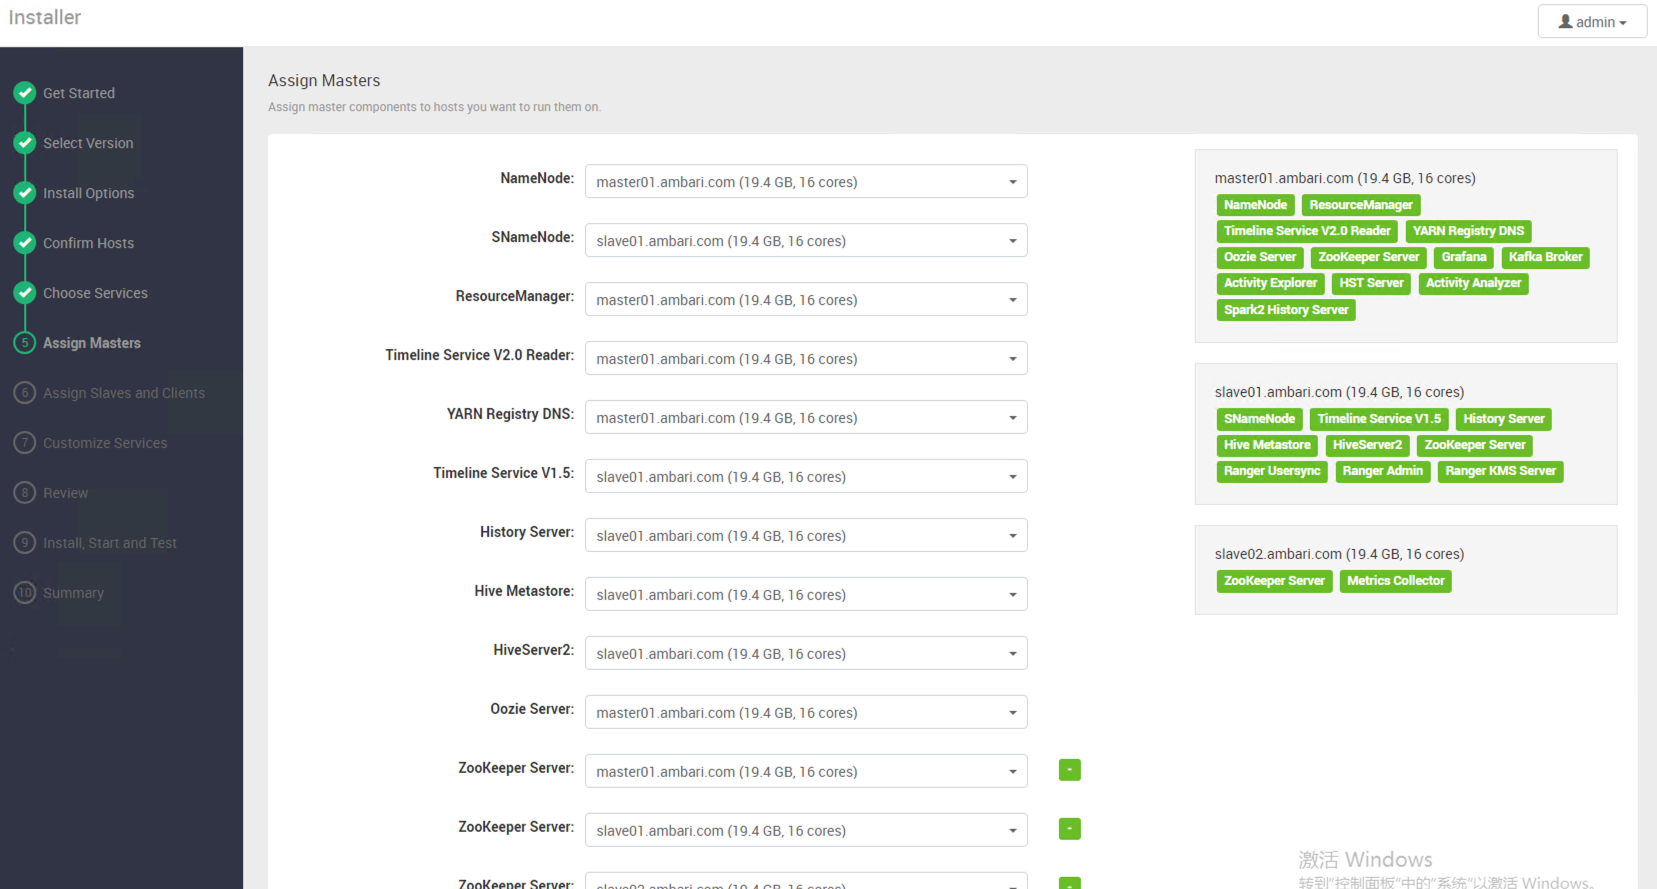
Step 5: Assign Masters.
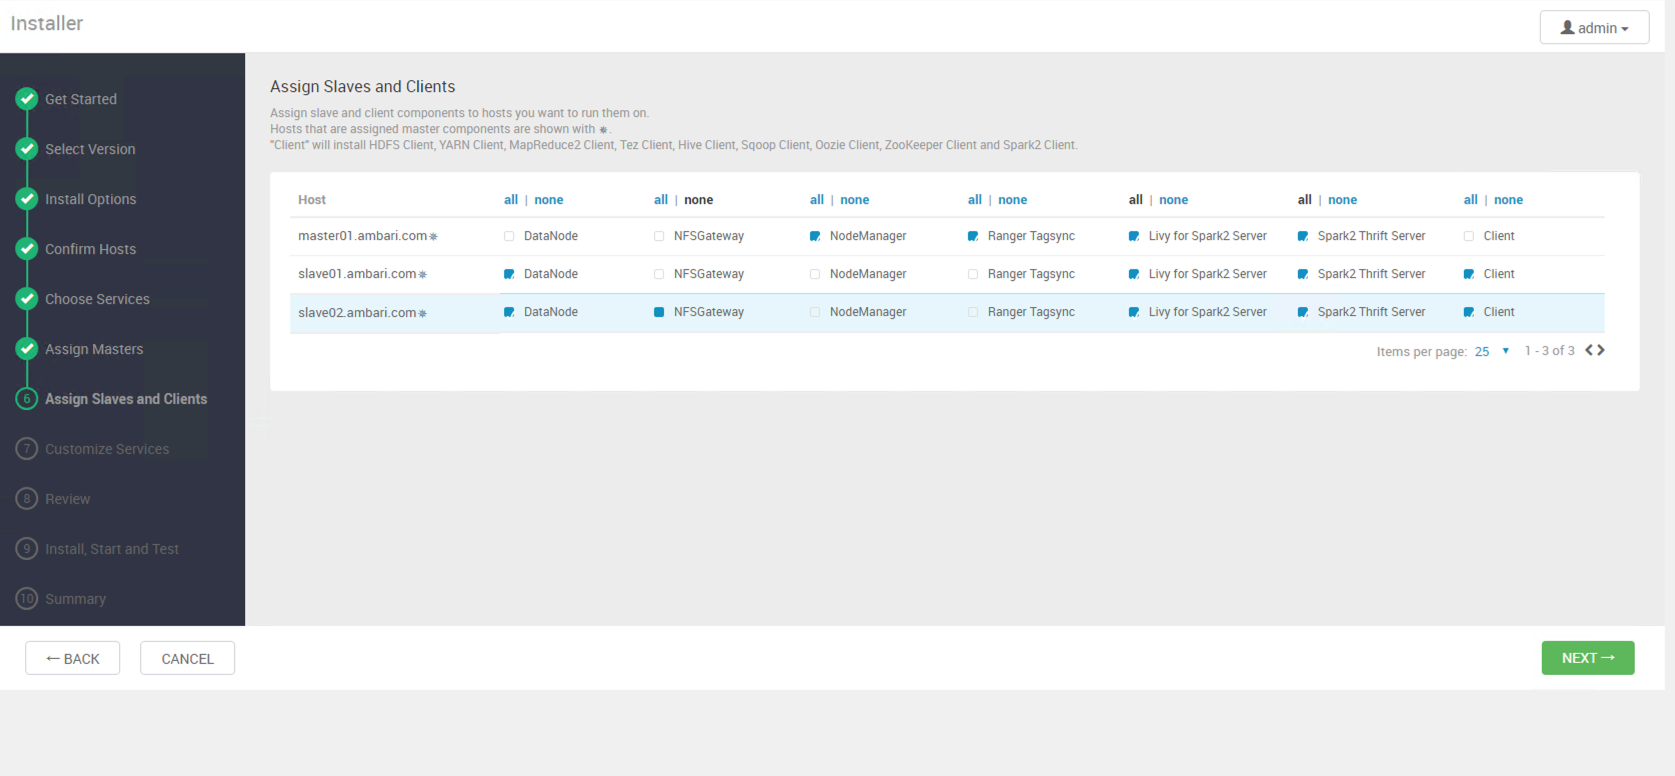
Step 6: Assign Slaves and Clients.
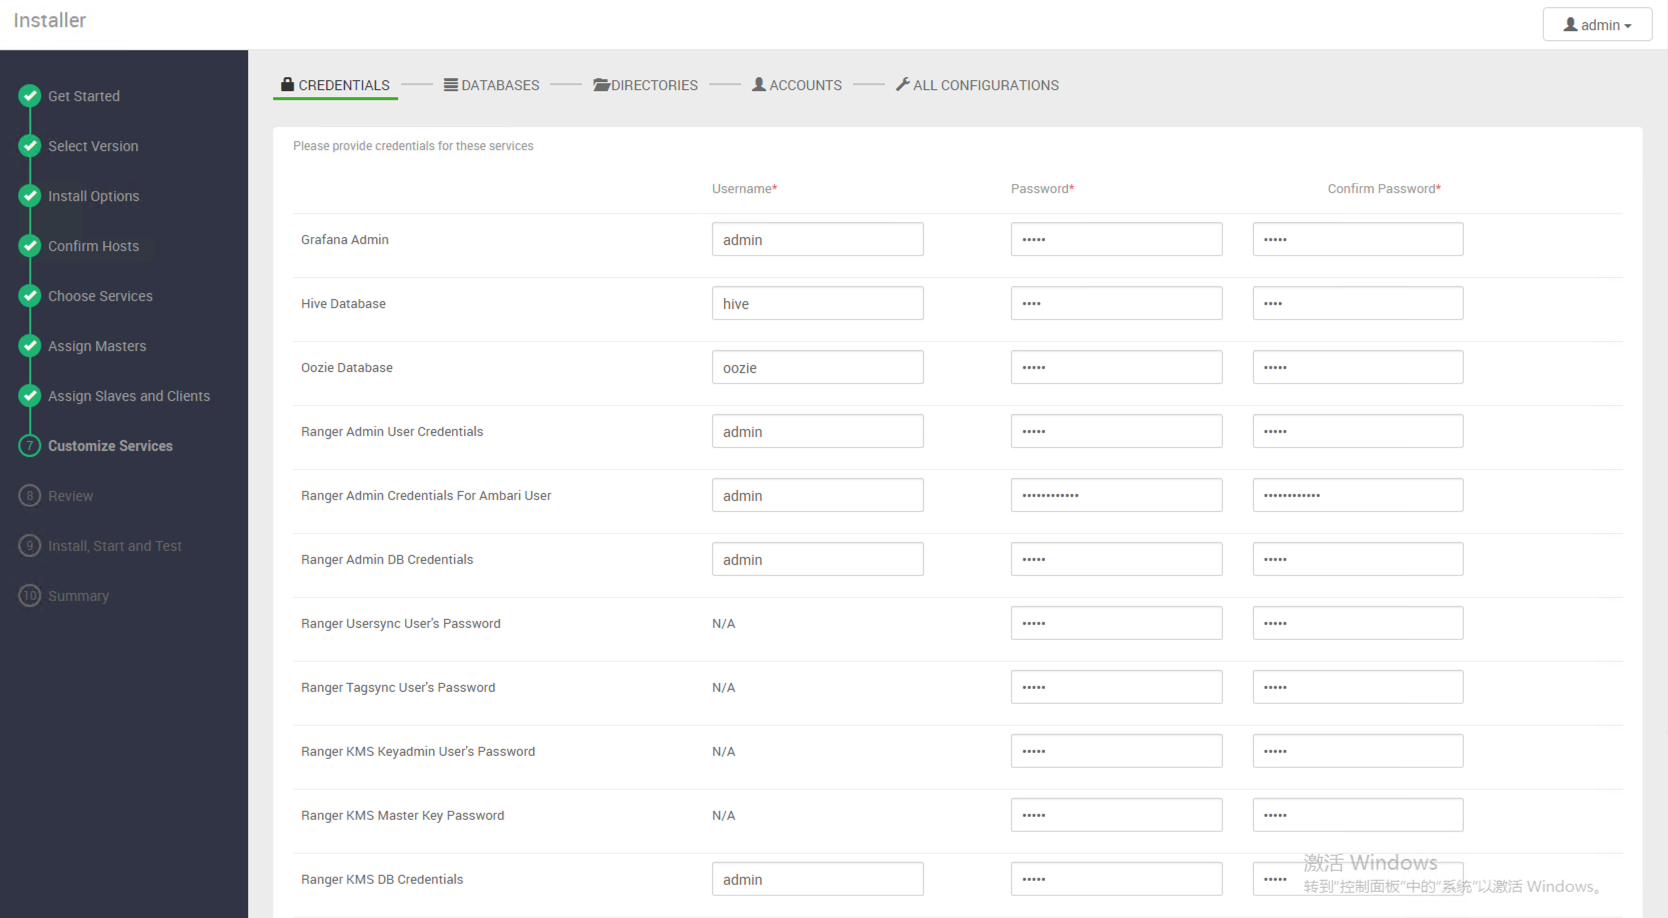
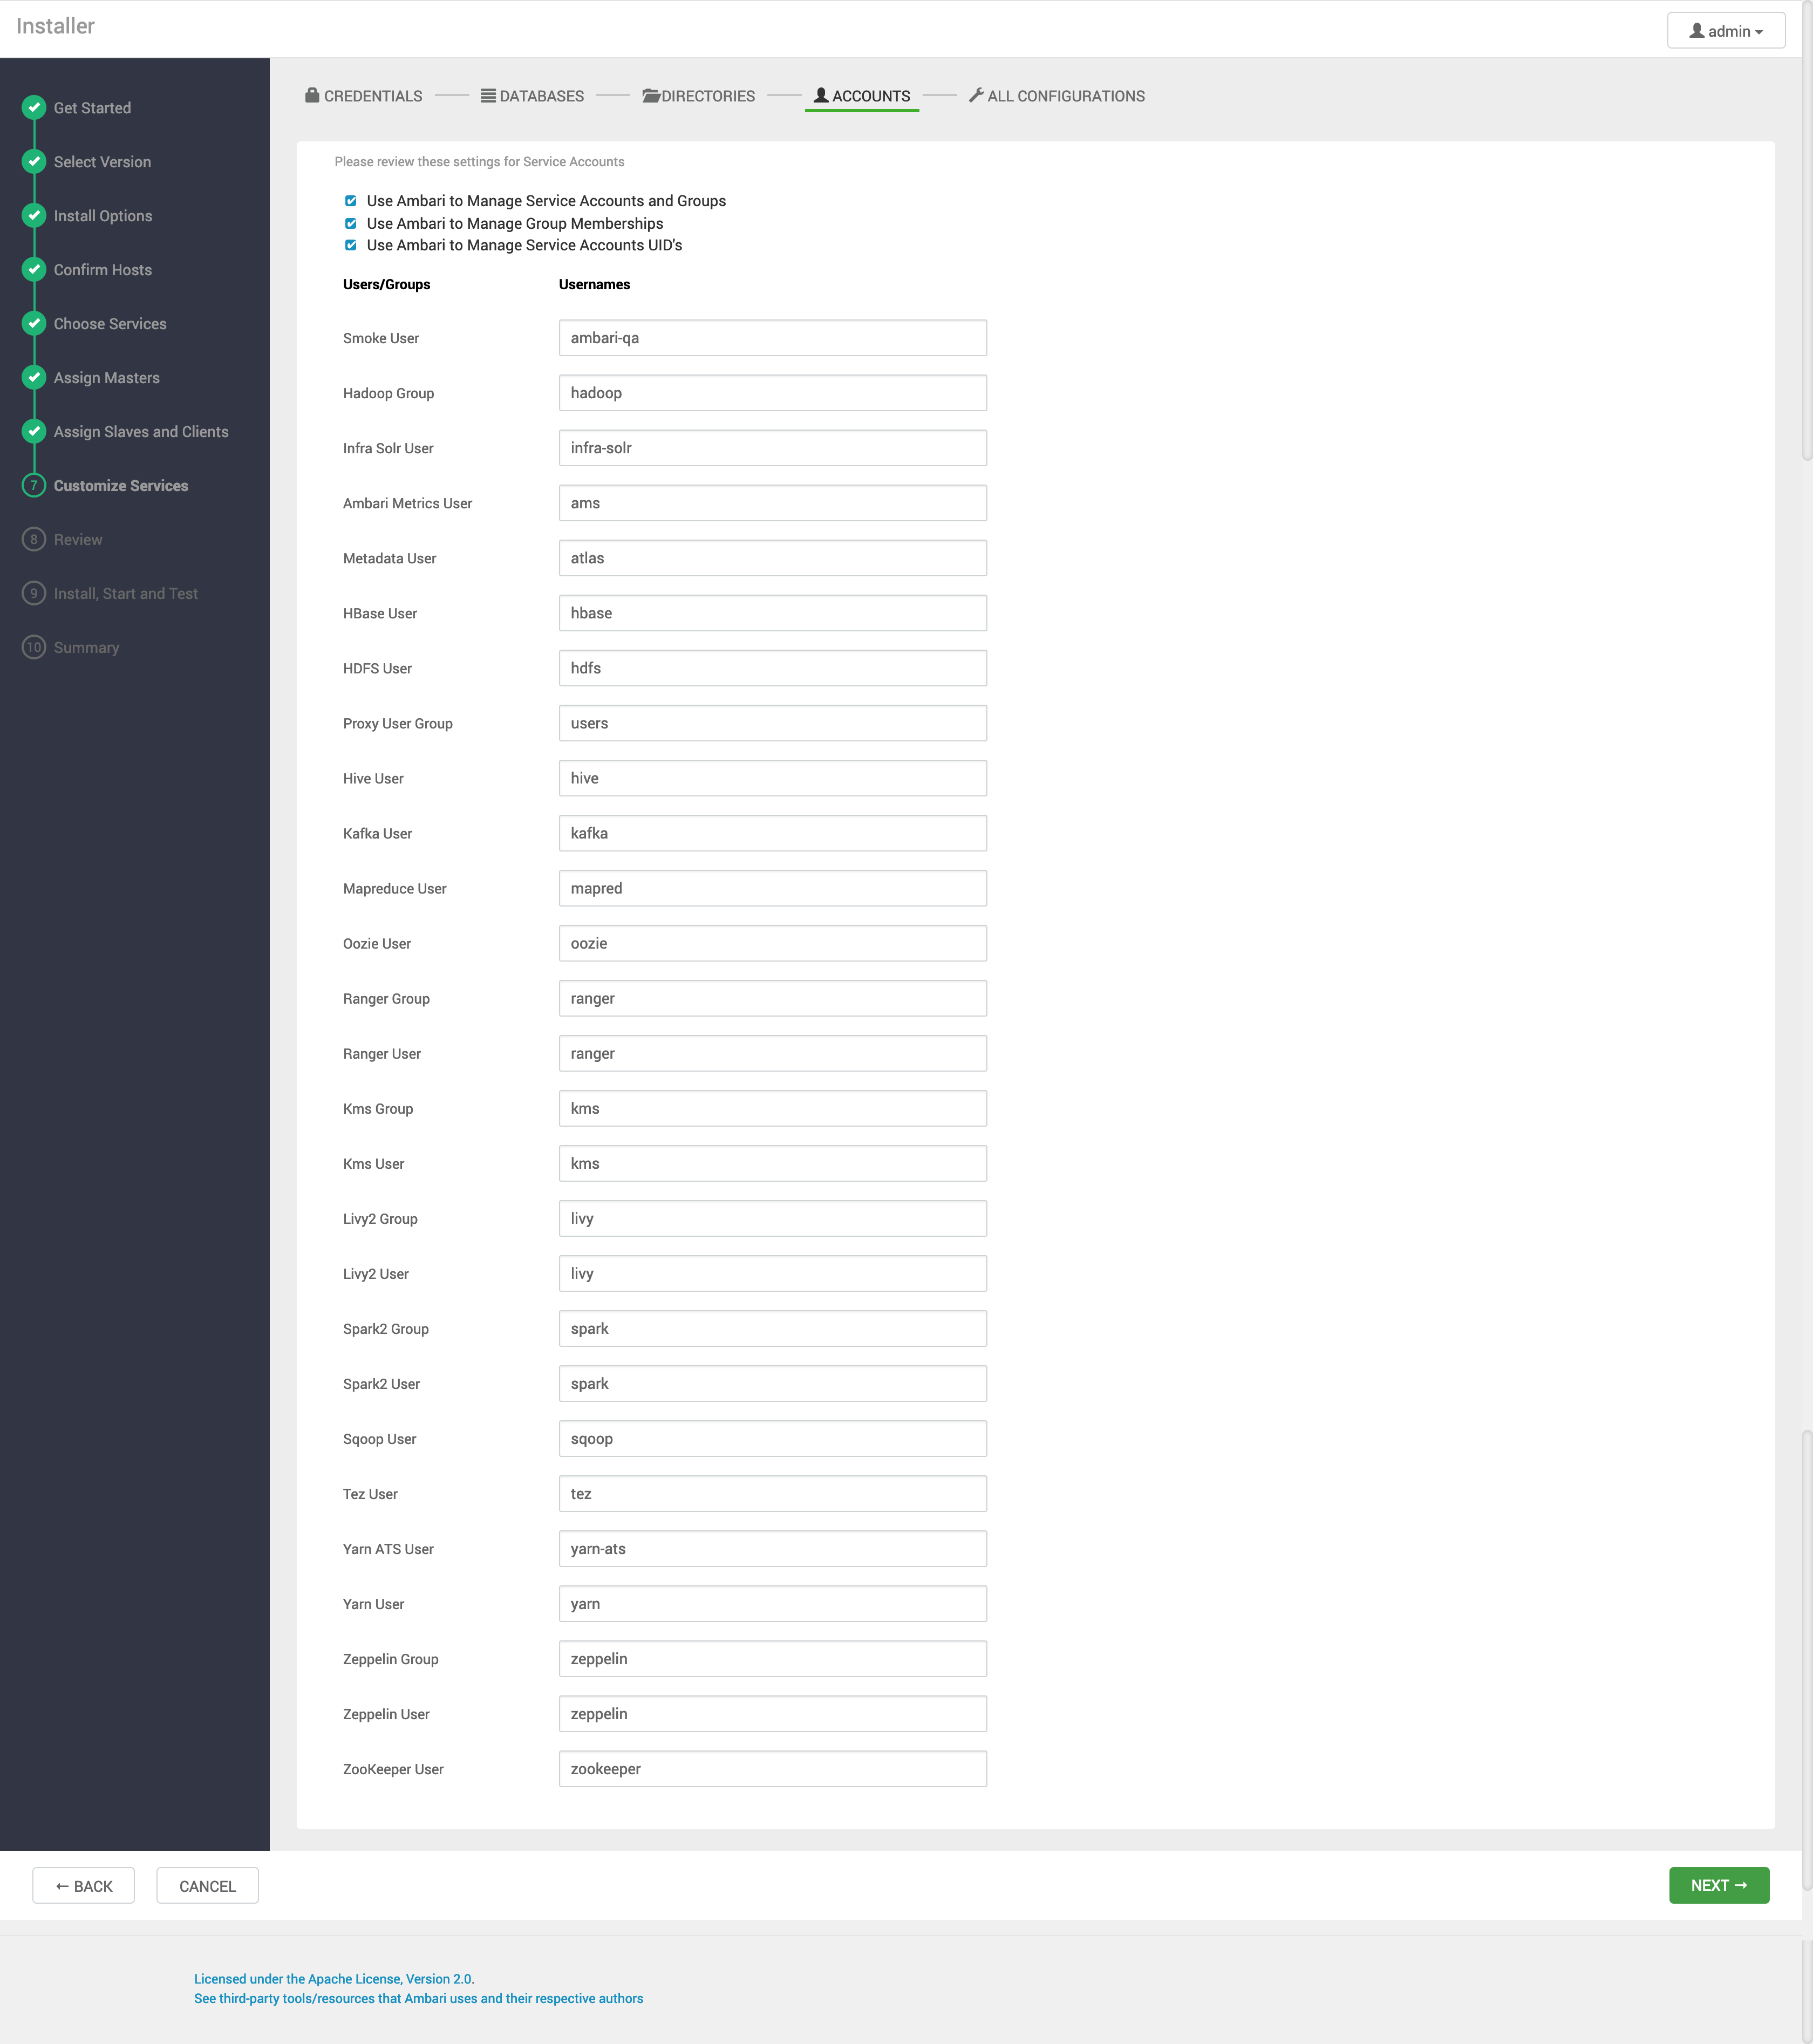
Step 7-1: Input usernames and passwords for your services.
Step 7-2: Create Databases and users for services, then input information for login.
1
2
3
4
5
6
7
8
9
10
11
12
13
14
15
16
17
18
19
20
21
22
23
24
25
26
27#Ranger
create database ranger;
create user 'ranger'@'localhost' identified by 'ranger';
create user 'ranger'@'master01.ambari.com' identified by 'ranger';
grant all on ranger.* to 'ranger'@'localhost';
grant all on ranger.* to 'ranger'@'master01.ambari.com';
#RangerKMS
create database rangerkms;
create user 'rangerkms'@'localhost' identified by 'rangerkms';
create user 'rangerkms'@'master01.ambari.com' identified by 'rangerkms';
grant all on rangerkms.* to 'rangerkms'@'localhost';
grant all on rangerkms.* to 'rangerkms'@'master01.ambari.com';
#Oozie
create database oozie;
create user 'oozie'@'localhost' identified by 'oozie';
create user 'oozie'@'master01.ambari.com' identified by 'oozie';
grant all on oozie.* to 'oozie'@'localhost';
grant all on oozie.* to 'oozie'@'master01.ambari.com';
#Hive
create database hive;
create user 'hive'@'localhost' identified by 'hive';
create user 'hive'@'master01.ambari.com' identified by 'hive';
grant all on hive.* to 'hive'@'localhost';
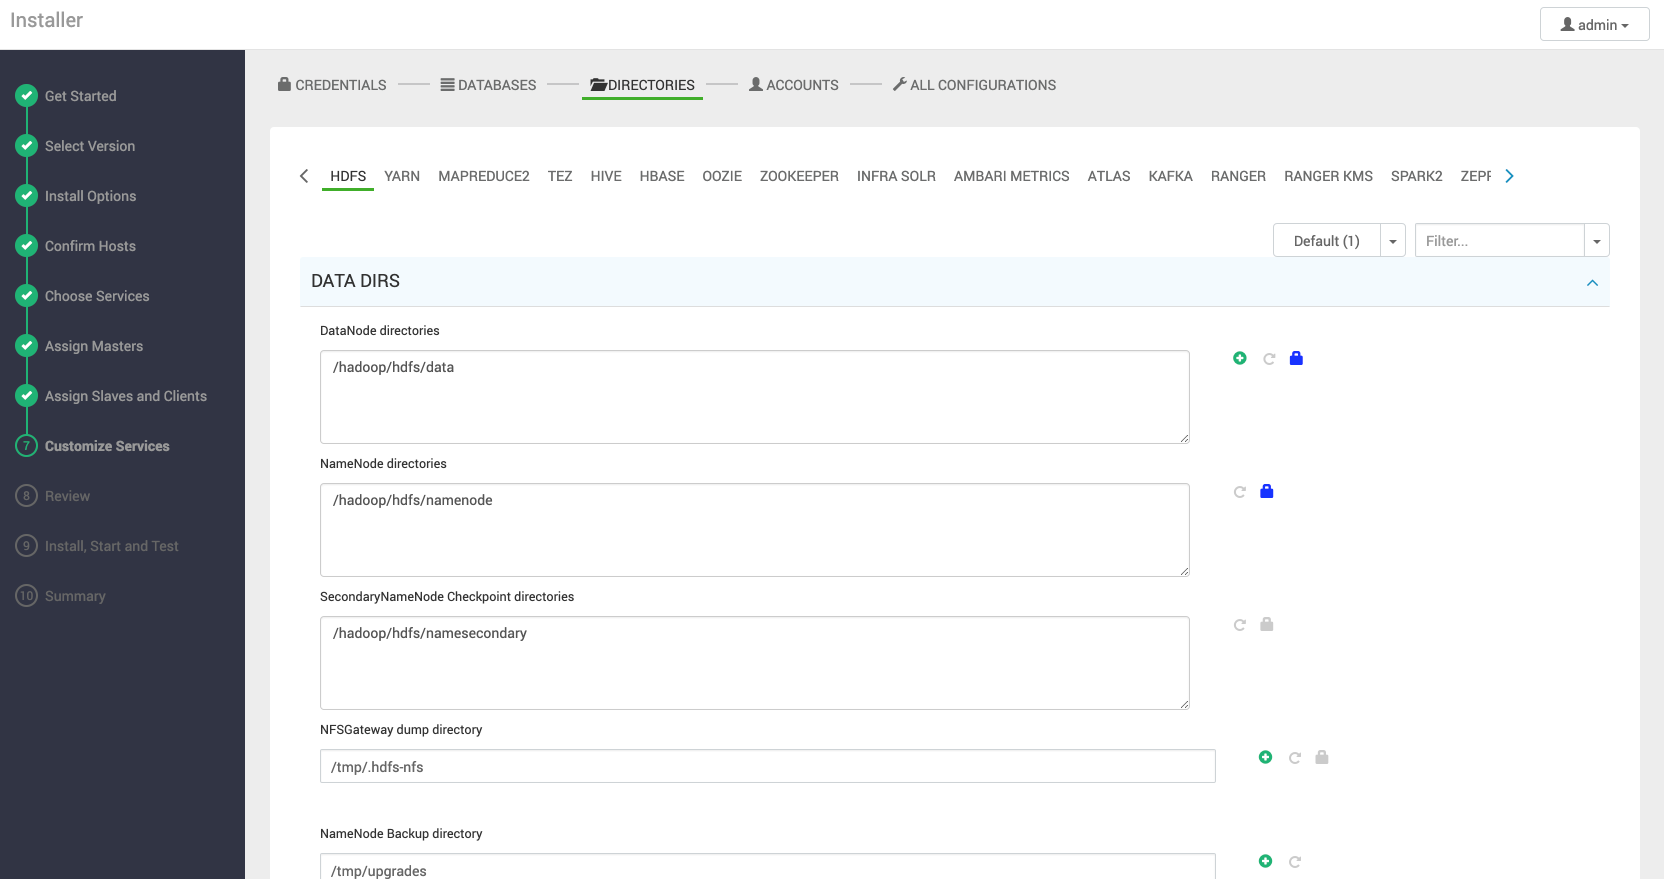
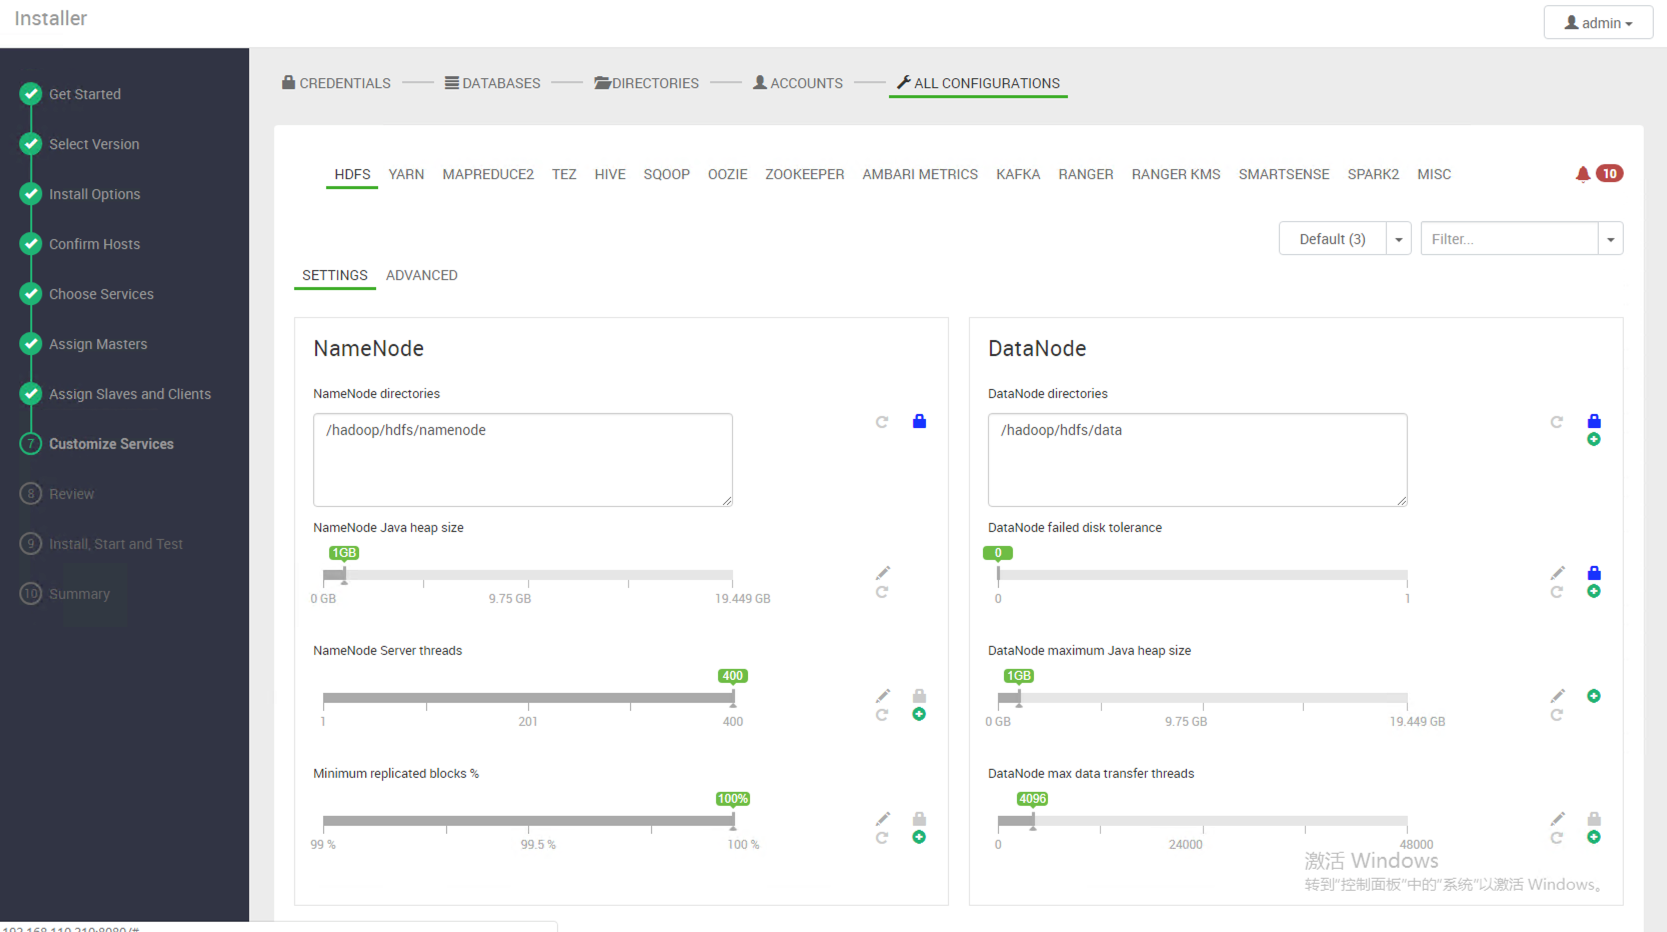
grant all on hive.* to 'hive'@'master01.ambari.com';Step 7-3: Follow other steps to complete.

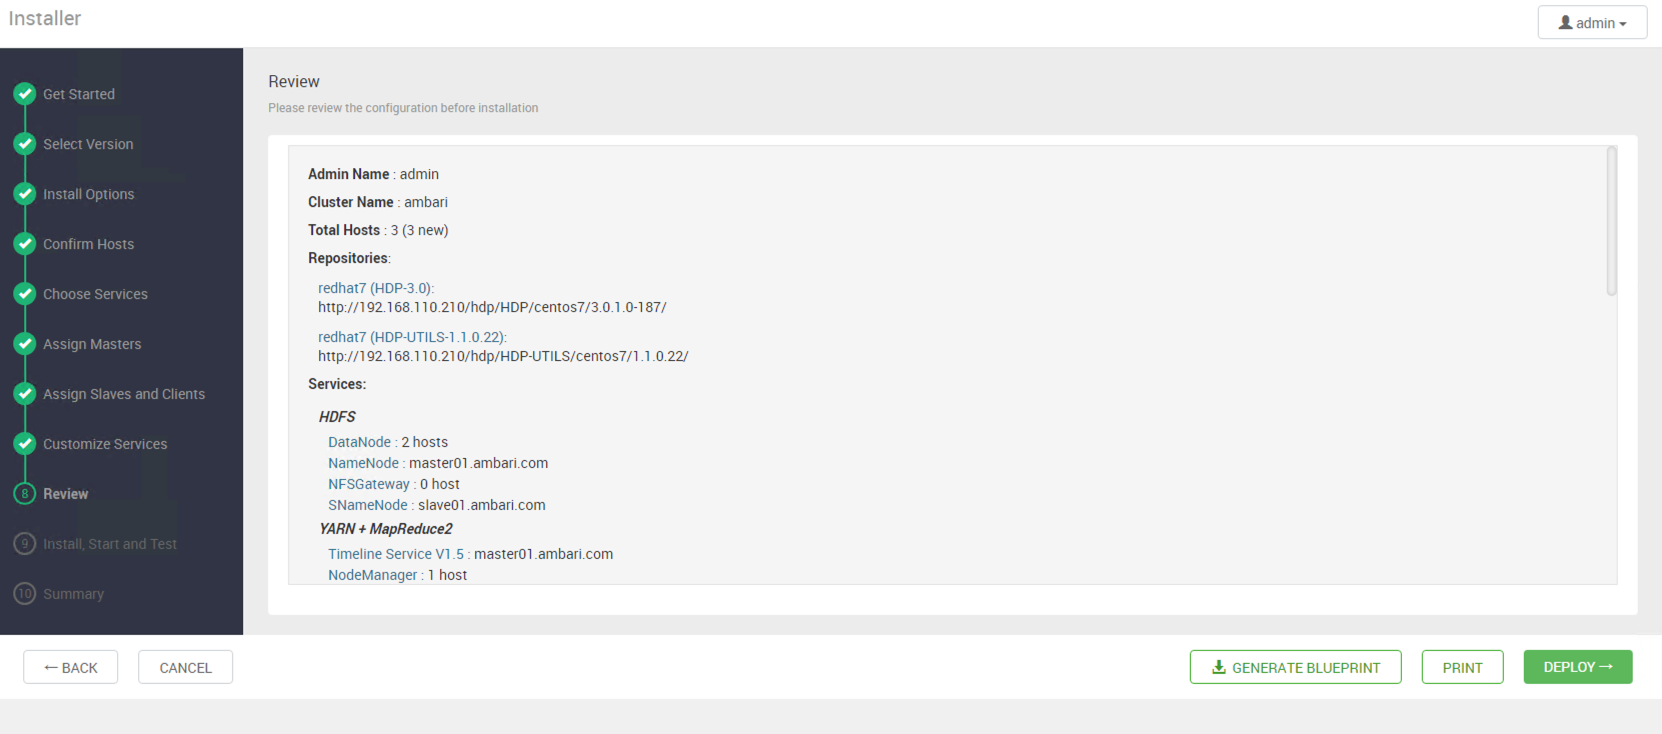
Step 8: Review
Step 9: Install, Start, and Test.
Summary.
Completion
Installing HDF on Ambari 2.7.1 + HDP 3.0.1
Regarding the HDF installation, I will write another post to describe specifically.