Several Tricks for Using Hexo Efficiently
change theme
add a theme to your Hexo (eg. theme next)
1
git clone https://github.com/theme-next/hexo-theme-next themes/next
update your blog config file(_config.yml, not your theme config file)
1
2
3
4
# Extensions
## Plugins: https://hexo.io/plugins/
## Themes: https://hexo.io/themes/
theme: next
add RSS plugin
install RSS tools by npm
1
npm install --save hexo-generator-feed
update your blog config file(_config.yml, not your theme config file)
1
2
3
4
5
feed: # RSS订阅插件
type: atom
path: atom.xml
limit: 0
plugins: hexo-generate-feedupdate your theme config file(theme/_config.yml)
1
2
3
4
# Set RSS to false to disable feed link.
# Leave RSS as empty to use site's feed link, and install hexo-generator-feed: `npm install hexo-generator-feed --save`.
# Set RSS to specific value if you have burned your feed already.
rss: /atom.xml
change the code block theme
1 | # Code Highlight theme |
record the number of viewers
1 | # Show Views/Visitors of the website/page with busuanzi. |
generate the excerpt
There are two methods for generating excerpts for the home page.
update theme config file (theme/next/_config.yml)
It is not good for you when you are using markdown language because of the bad show effect.1
2
3
4
5# Automatically Excerpt. Not recommend.
# Use <!-- more --> in the post to control excerpt accurately.
auto_excerpt:
enable: true
length: 300add markdown code in your post to control excerpt accurately
1
<!-- more -->
add search plugin
install search plugin
1
npm install hexo-generator-search --save
update the blog config file
1
2
3
4
5search:
path: search.xml
field: post
format: html
limit: 10000update the theme config file
1
2
3
4
5
6
7
8
9
10
11# Local search
# Dependencies: https://github.com/theme-next/hexo-generator-searchdb
local_search:
enable: true
# if auto, trigger search by changing input
# if manual, trigger search by pressing enter key or search button
trigger: auto
# show top n results per article, show all results by setting to -1
top_n_per_article: 1
# unescape html strings to the readable one
unescape: false
add share plugin
get the module from GitHub
1
2cd themes/next
git clone https://github.com/theme-next/theme-next-needmoreshare2 source/lib/needsharebuttonupdate the theme config file
1
2
3
4
5
6
7
8
9
10
11
12
13
14
15
16needmoreshare2:
enable: true
postbottom:
enable: true
options:
iconStyle: box
boxForm: horizontal
position: bottomCenter
networks: Weibo,Wechat,Twitter,Facebook
float:
enable: false
options:
iconStyle: box
boxForm: horizontal
position: middleRight
networks: Weibo,Wechat,Twitter,Facebook
add google analytics
update the theme config file
1
2# Google Analytics
google_analytics: your google track code
add reward
update the theme config file
1
2
3
4
5
6
7
8
9# Reward
# If true, reward would be displayed in every article by default.
# And you can show or hide one article specially through add page variable `reward: true/false`.
reward:
enable: true
comment: Thanks For Your Donation!
wechatpay: /images/wechatpay.jpg
alipay: /images/alipay.jpg
#bitcoin: /images/bitcoin.jpg
generate a permanent post address
install plugin
1
npm install hexo-abbrlink --save
update the blog config file
1
2
3
4
5
6# permalink: :year/:month/:day/:title/
# permalink_defaults:
permalink: posts/:abbrlink.html
abbrlink:
alg: crc32 # 算法:crc16(default) and crc32
rep: hex # 进制:dec(default) and hex
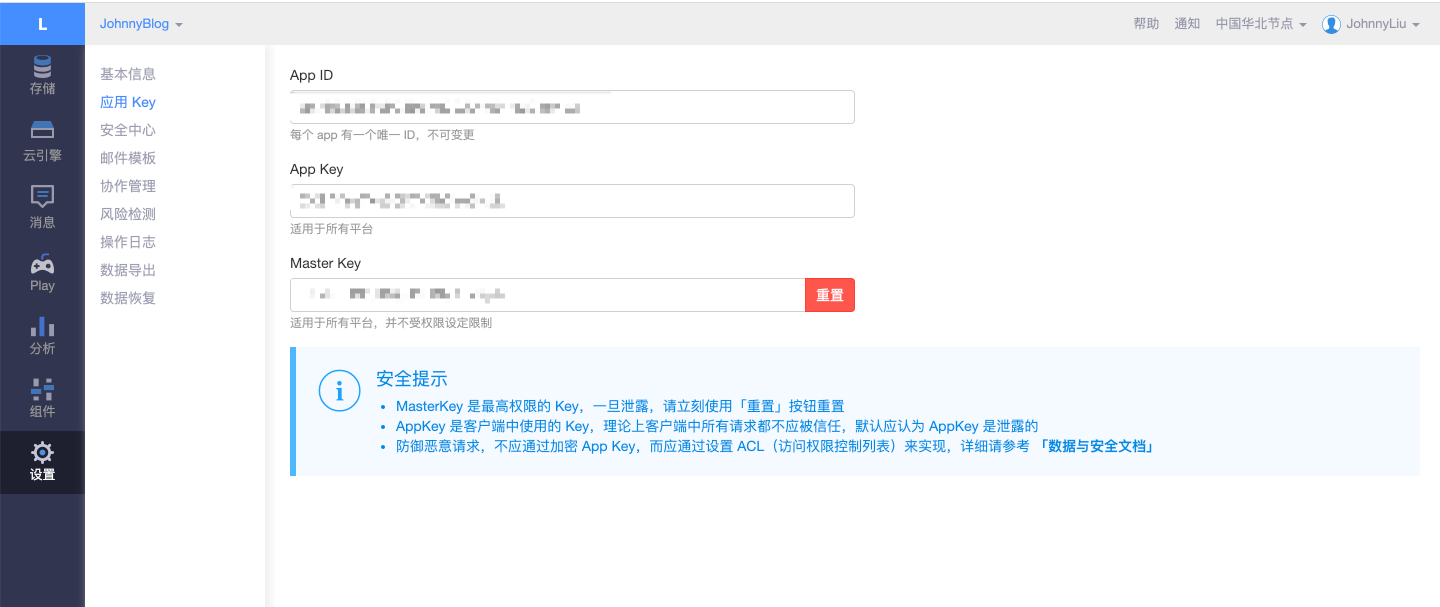
add comment module (valine)
sign up for a leancloud account
create an application for your comment system
copy AppID and AppKey from your dashboard

paste AppID and AppKey into your theme config file
1
2
3
4
5
6
7
8
9
10
11
12valine:
enable: true # When enable is set to be true, leancloud_visitors is recommended to be closed for the re-initialization problem within different leancloud adk version.
appid: xxxxxxxxxx # your leancloud application appid
appkey: xxxxxxxxxx # your leancloud application appkey
notify: false # mail notifier, See: https://github.com/xCss/Valine/wiki
verify: false # Verification code
placeholder: Just go go # comment box placeholder
avatar: mm # gravatar style
guest_info: nick,mail # custom comment header
pageSize: 10 # pagination size
visitor: true # leancloud-counter-security is not supported for now. When a visitor is set to be true, appid and appkey are recommended to be the same as leancloud_visitors' for counter compatibility. Article reading statistic https://valine.js.org/visitor.html
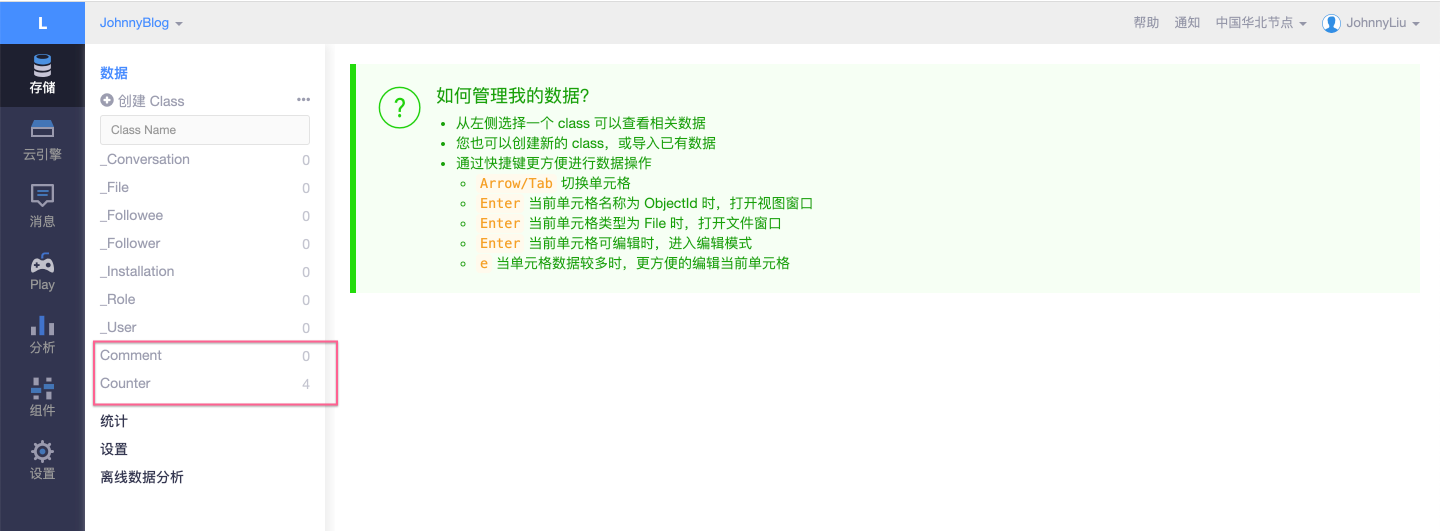
comment_count: true # if false, comment count will only be displayed in post page, not in home pagecreate classes in your leancloud account to store your data
[not required] you can change your valine lanuage (themes/next/layout/_third-party/comments/valine.swig)
1
2
3
4
5
6
7
8
9
10
11
12
13new Valine({
el: '#comments',
lang: 'en',
verify: {{ theme.valine.verify }},
notify: {{ theme.valine.notify }},
appId: '{{ theme.valine.appid }}',
appKey: '{{ theme.valine.appkey }}',
placeholder: '{{ theme.valine.placeholder }}',
avatar: '{{ theme.valine.avatar }}',
meta: guest,
pageSize: '{{ theme.valine.pageSize }}' || 10,
visitor: {{ theme.valine.visitor }}
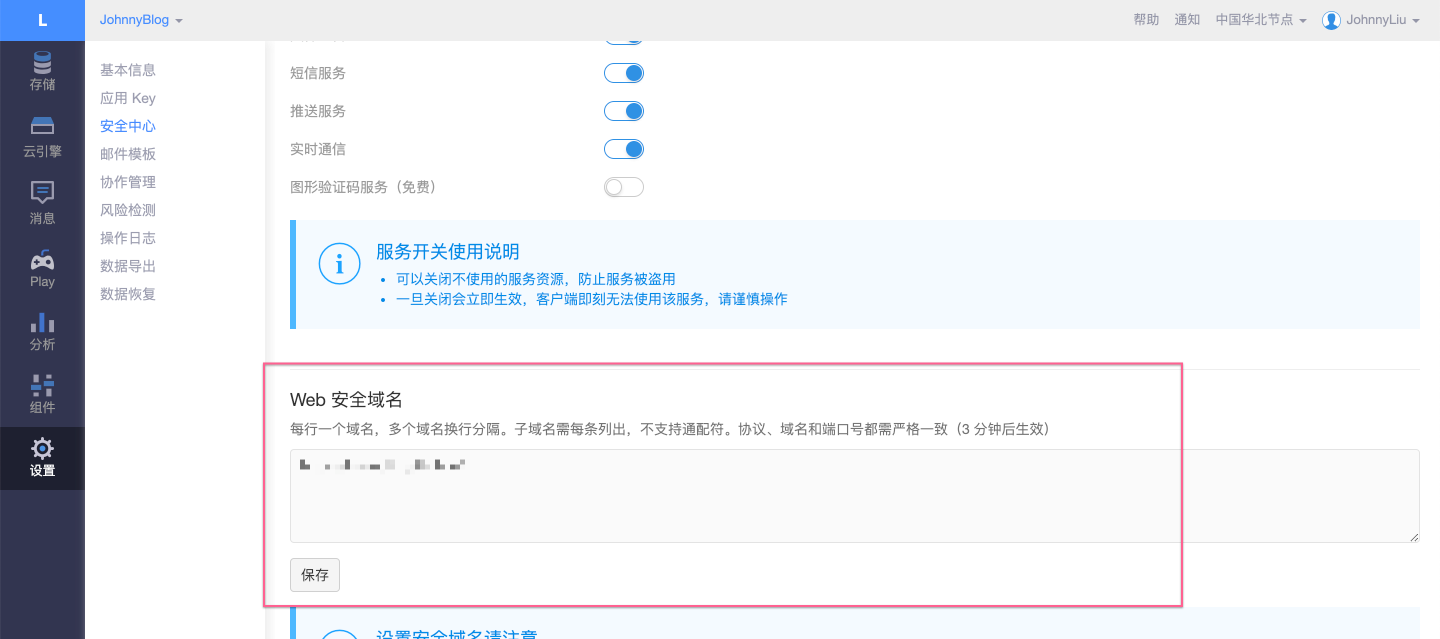
});[not required] you can also add a white list for security
use image plugin
install “hexo-asset-image” plugin
1
npm install hexo-asset-image --save
update your blog config file (_config.yml)
1
post_asset_folder: true
if you use the abbrlink plugin to change your permalink attribute in your blog config file, you need to edit this plugin to fit your config (node_modules/hexo-asset-image/index.js). Then you add a code block into this javascript file.
1
2
3var link = data.permalink;
link = link.replace('.html', '/'); //新增加,针对修改后的permalink
var beginPos = getPosition(link, '/', 3) + 1;Ok, you can generate your new static HTML file.
1
2hexo clean
hexo g
add creative commons module to your blog
It is convenient and useful for a bloger to announce your blog copyright announcement. So, you can add this below to your posts or add this to your profile information page.
update your theme config file
1
2
3
4
5
6
7# Creative Commons 4.0 International License.
# https://creativecommons.org/share-your-work/licensing-types-examples
# Available values: by | by-nc | by-nc-nd | by-nc-sa | by-nd | by-sa | zero
creative_commons:
license: by-nc-sa
sidebar: true
post: true